
The Grand Canyon is one of the most photographed places on earth — and also one of the harder ones to photograph well. I spent a week there in late May, hiking from the North Rim to the South Rim with a camera on my back, and I came away with a strategy I wish I'd had on day one.
In this post I'll cover my Grand Canyon trip from a photographer's standpoint: my itinerary, maps, the best photography spots and tips for them, and some ideas of what I'd do differently or what you should plan ahead for if you want to shoot landscapes on both rims and hike rim to rim.
My itinerary and route
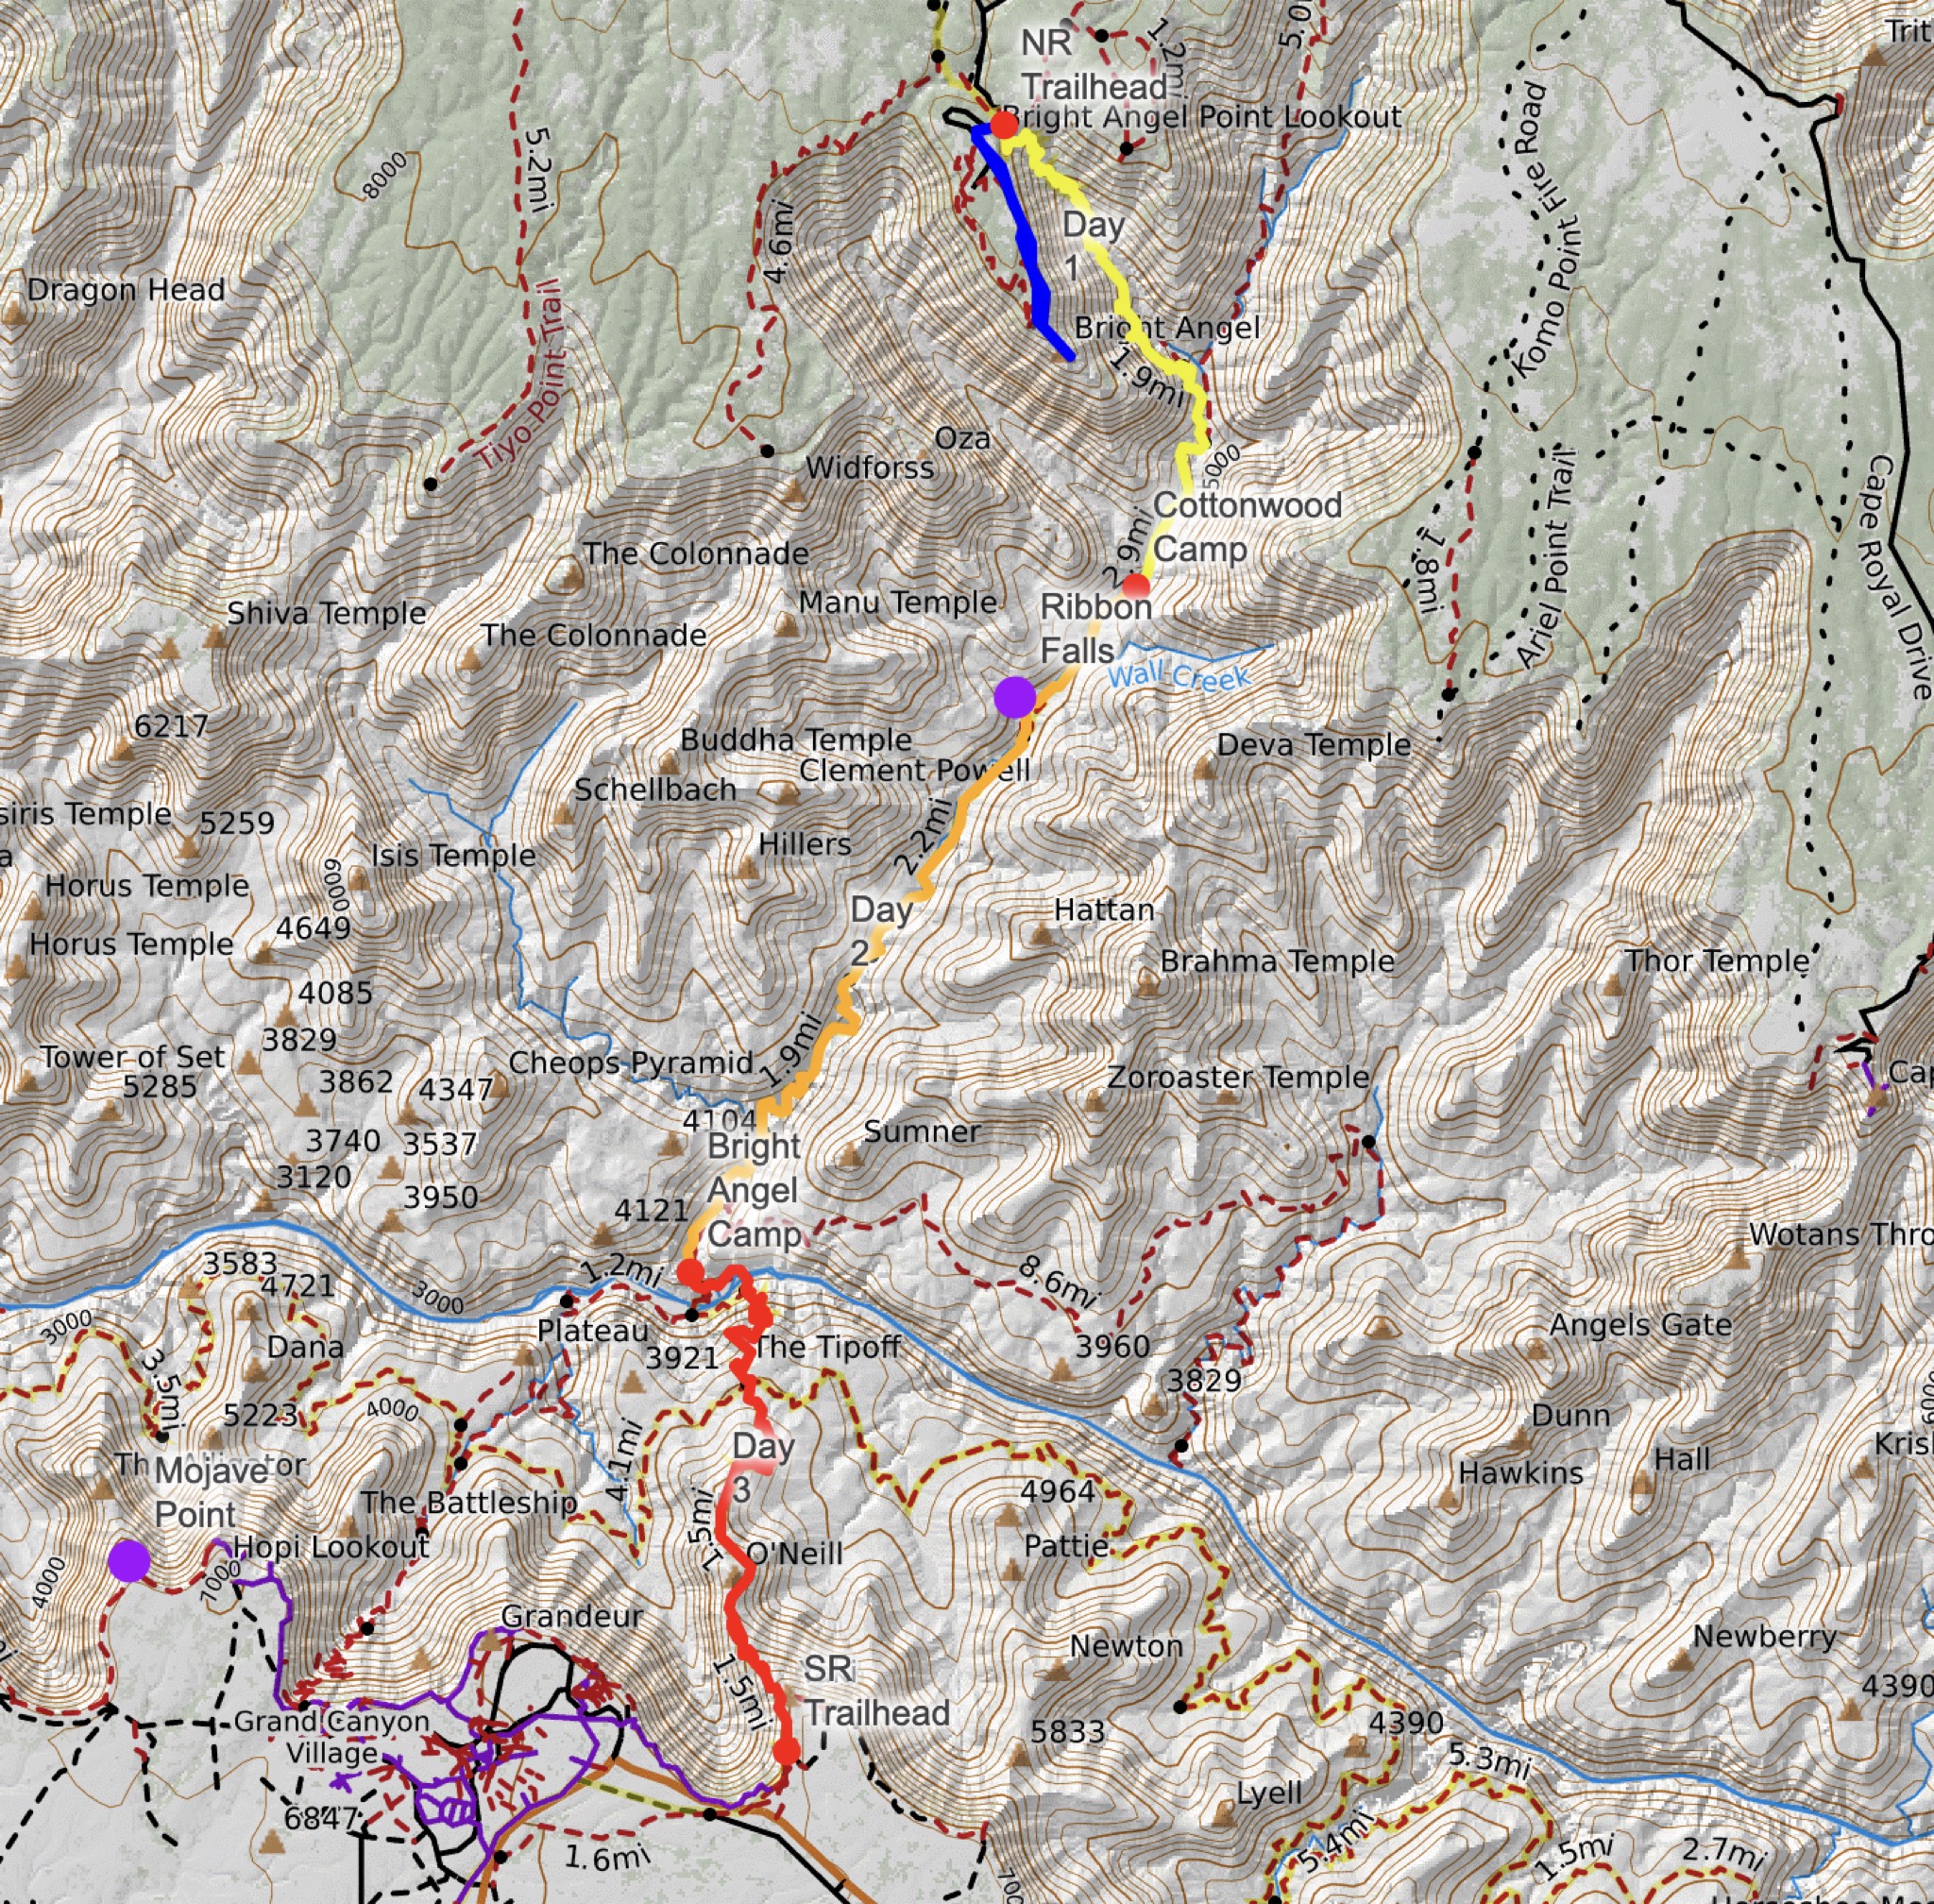
My trip took one week, starting May 26th, 2026. I stayed in Mather Campground for three nights, took a transfer to the North Rim, and stayed at a lodge — due to a recent fire on the North Rim, it's the closest place to the North Kaibab trailhead you can still stay. From there I hiked rim to rim with overnight stops at Cottonwood Camp and Bright Angel Camp, climbed out on the South Kaibab Trail, and camped one more night back at Mather.
On the map below I've marked the route I took and my favorite spots to shoot.
When to go — and the light
That week was enough for me to start understanding the specifics of the Grand Canyon, develop my strategy for photography, and visit its most interesting locations. For late-May to early-June photography, it was essential to be up at 3:30–4am every day to catch first light, and back at the rim around 7:30–9pm for golden and blue hours.
Gear and settings for the canyon's light
It's important to understand that Grand Canyon sunrises and sunsets have an incredible dynamic range of light — pretty much on every shot. So it pays to be comfortable with HDR settings on your camera, or with exposure blending techniques.
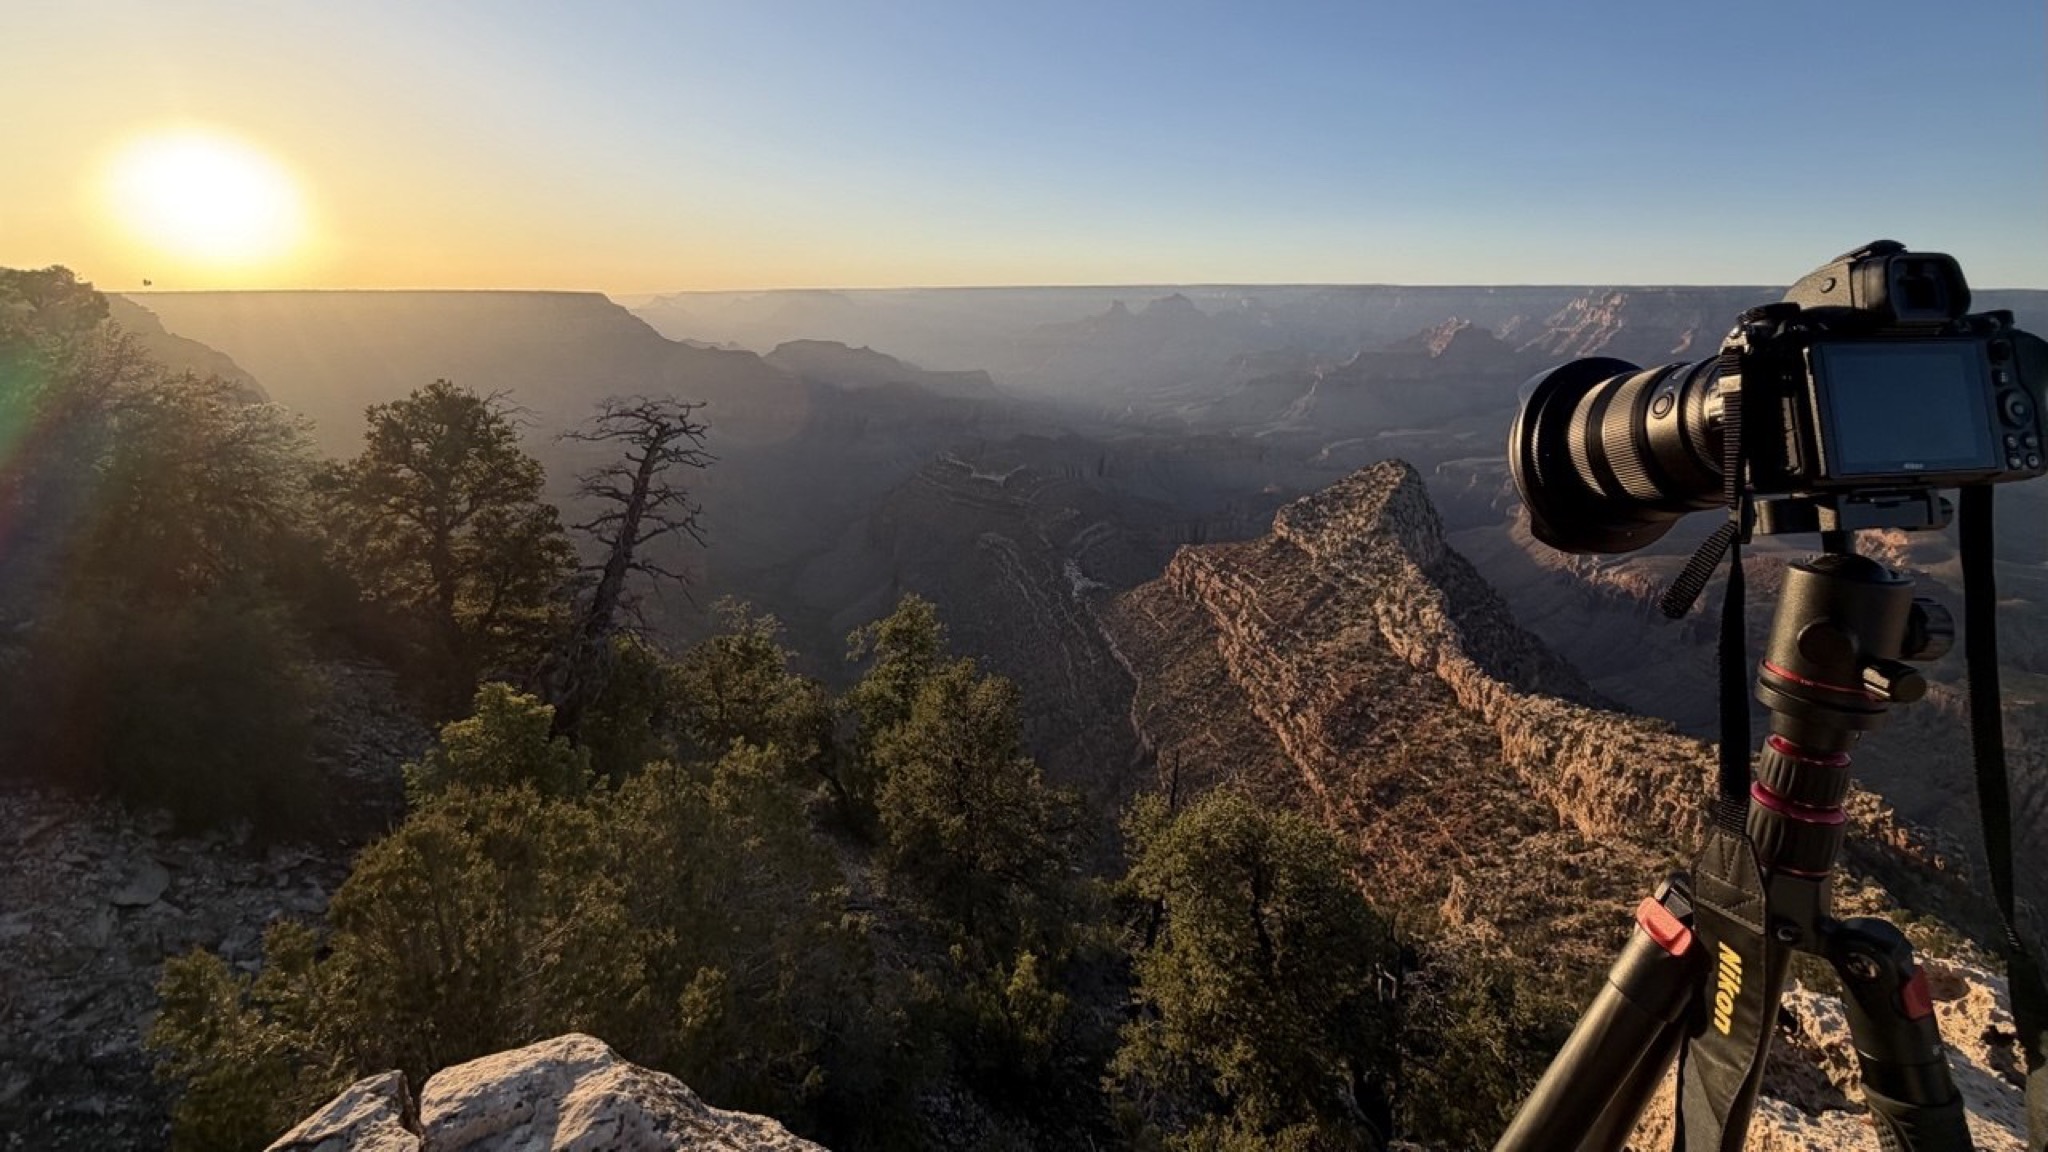
To help you capture your shots, I recommend bringing a sturdy tripod, a polarizer, and a couple of ND filters. The polarizer will help you "play" with the canyon's haze, and ND filters are very helpful with dynamic range, especially if you want to shoot into direct sunlight. A sturdy tripod is a MUST here: during my trip the winds were roaring, and half the time I had to hang my backpack under a mid-sized tripod (28mm leg diameter at the first leg extension) to get decent sharpness in my photos.
Shooting sunrise and sunset
Now for some tips and tricks for blue and golden hour photography.
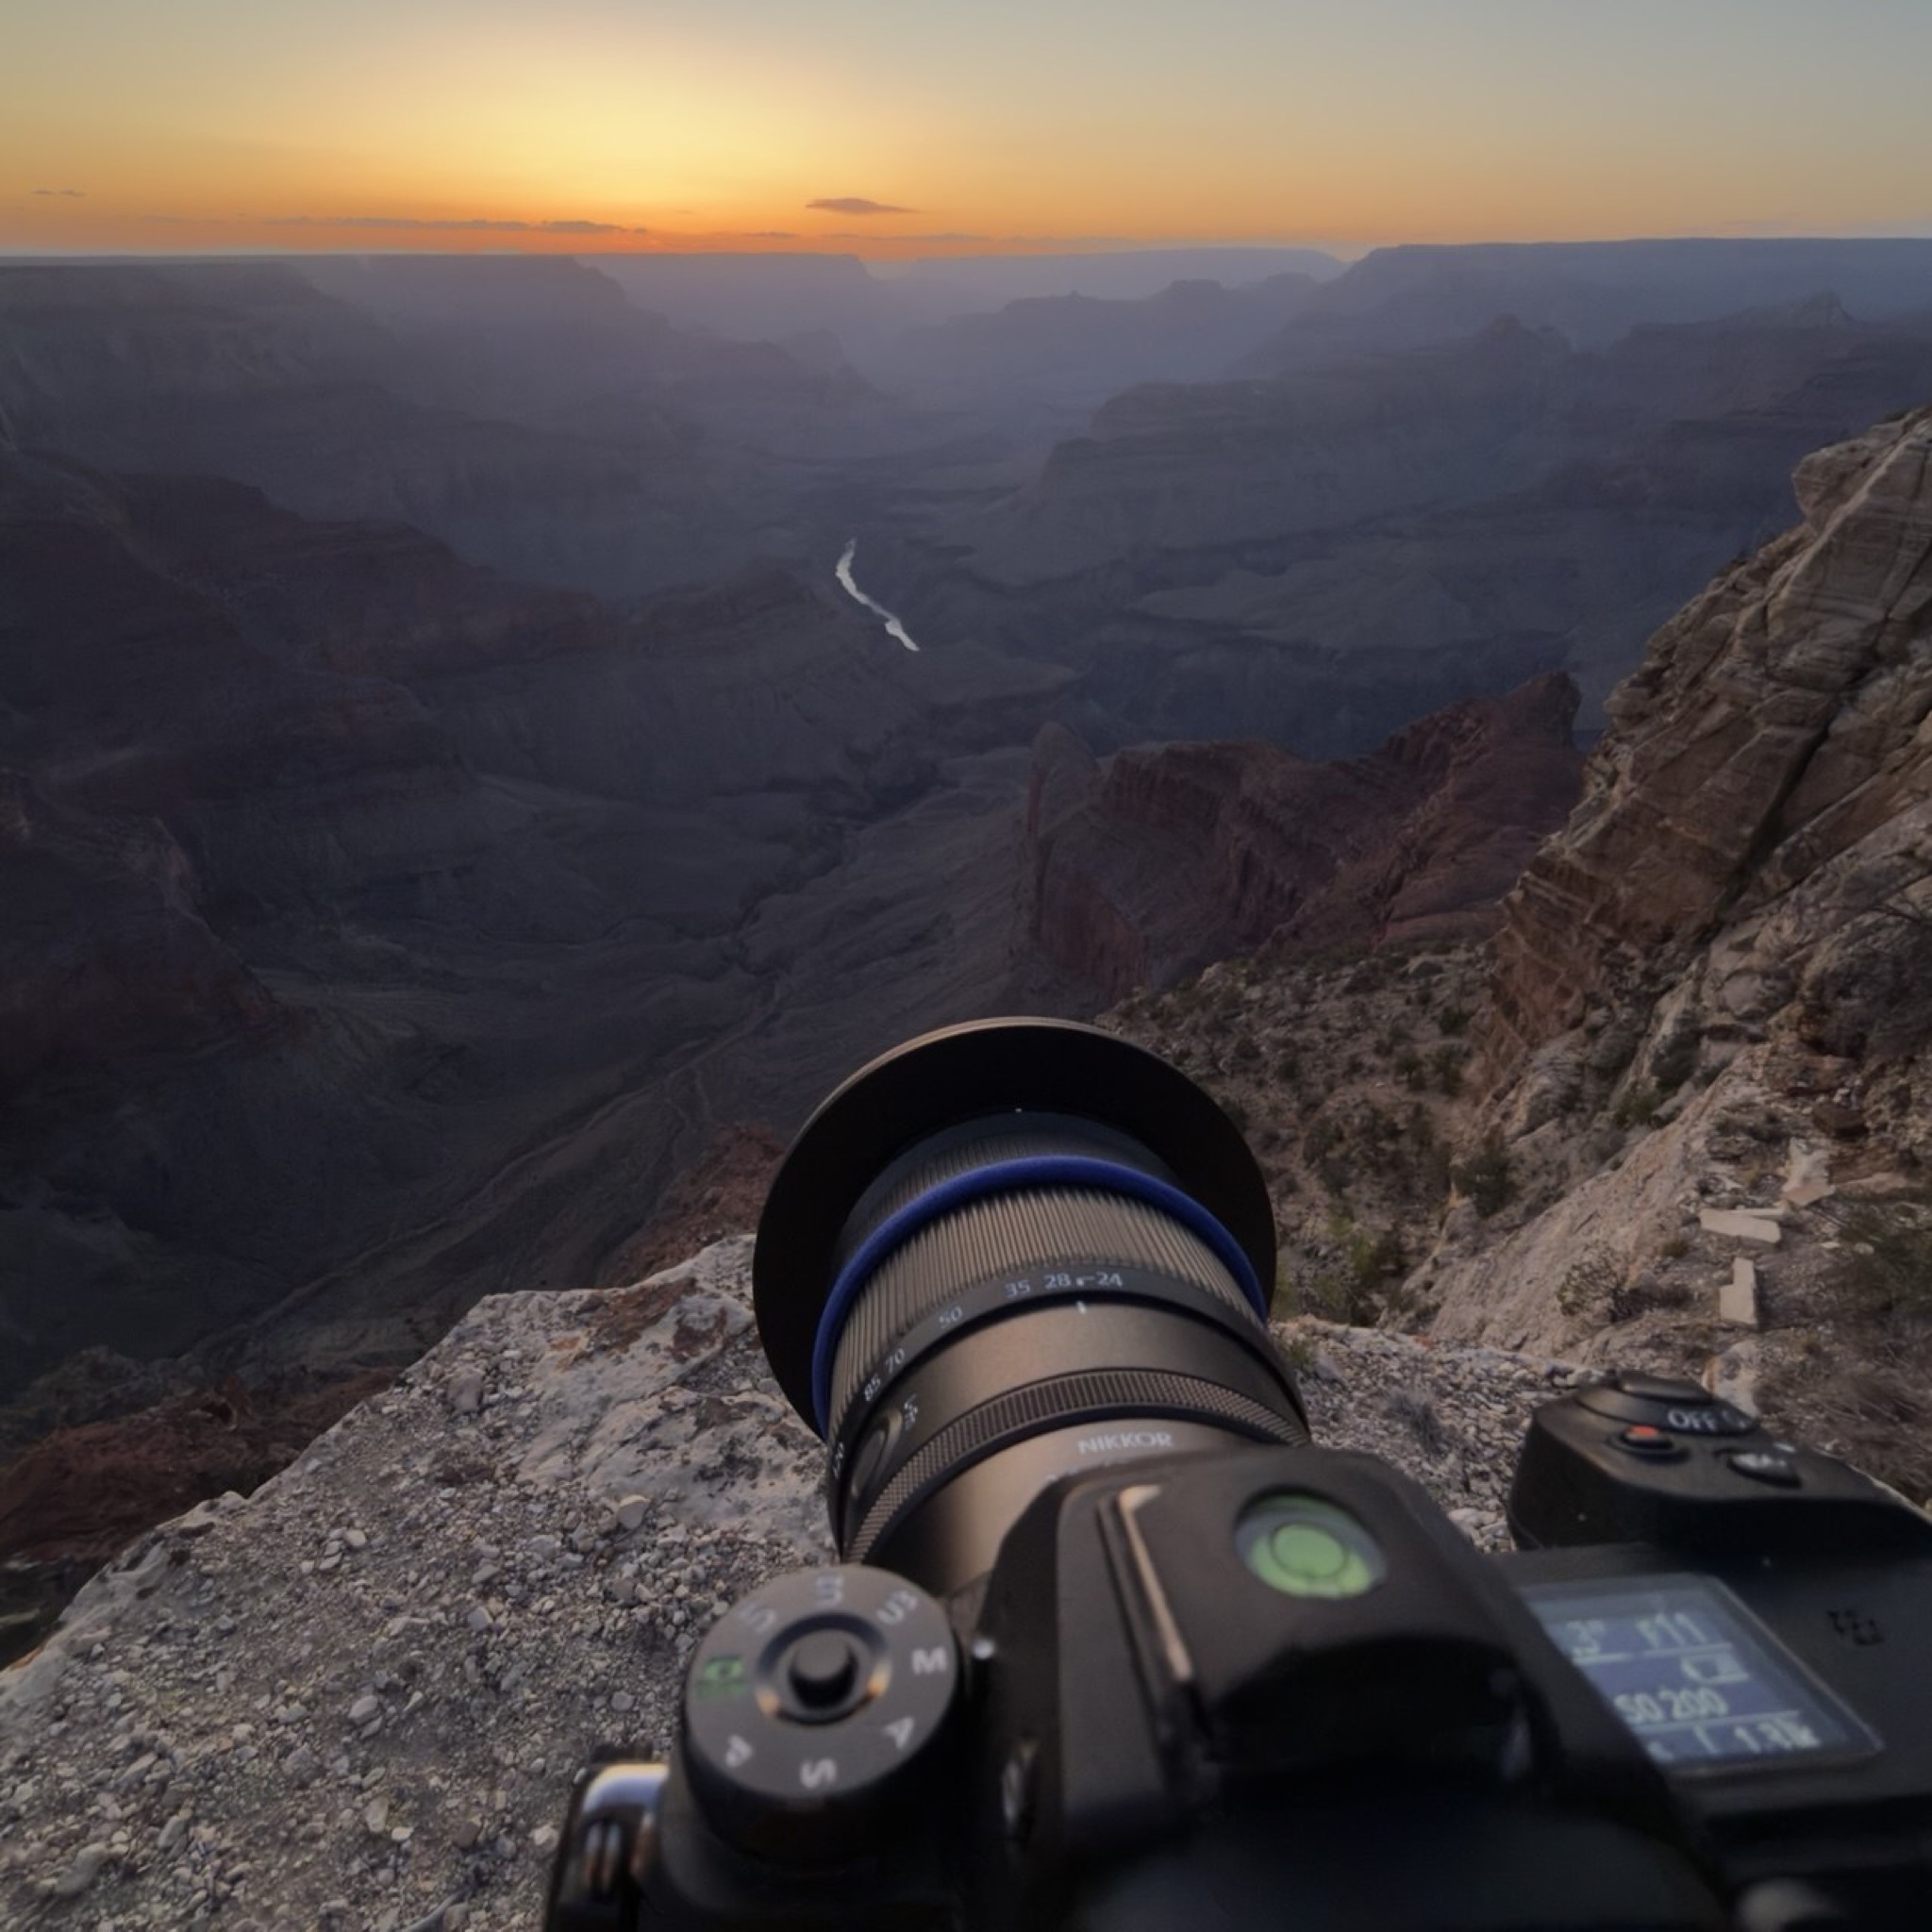
On the South Rim, there are bus routes that operate during summer. There's no way to get to, say, Mohave Point except by bus, which complicates sunrise photography — the Red Route's first bus is at 8am, way too late (you can find the schedule for all the buses here). My recommendation for morning shots is to drive Desert View Drive in your own car: it's open year-round to private vehicles, so you get plenty of options and you're not restricted to the bus schedule.
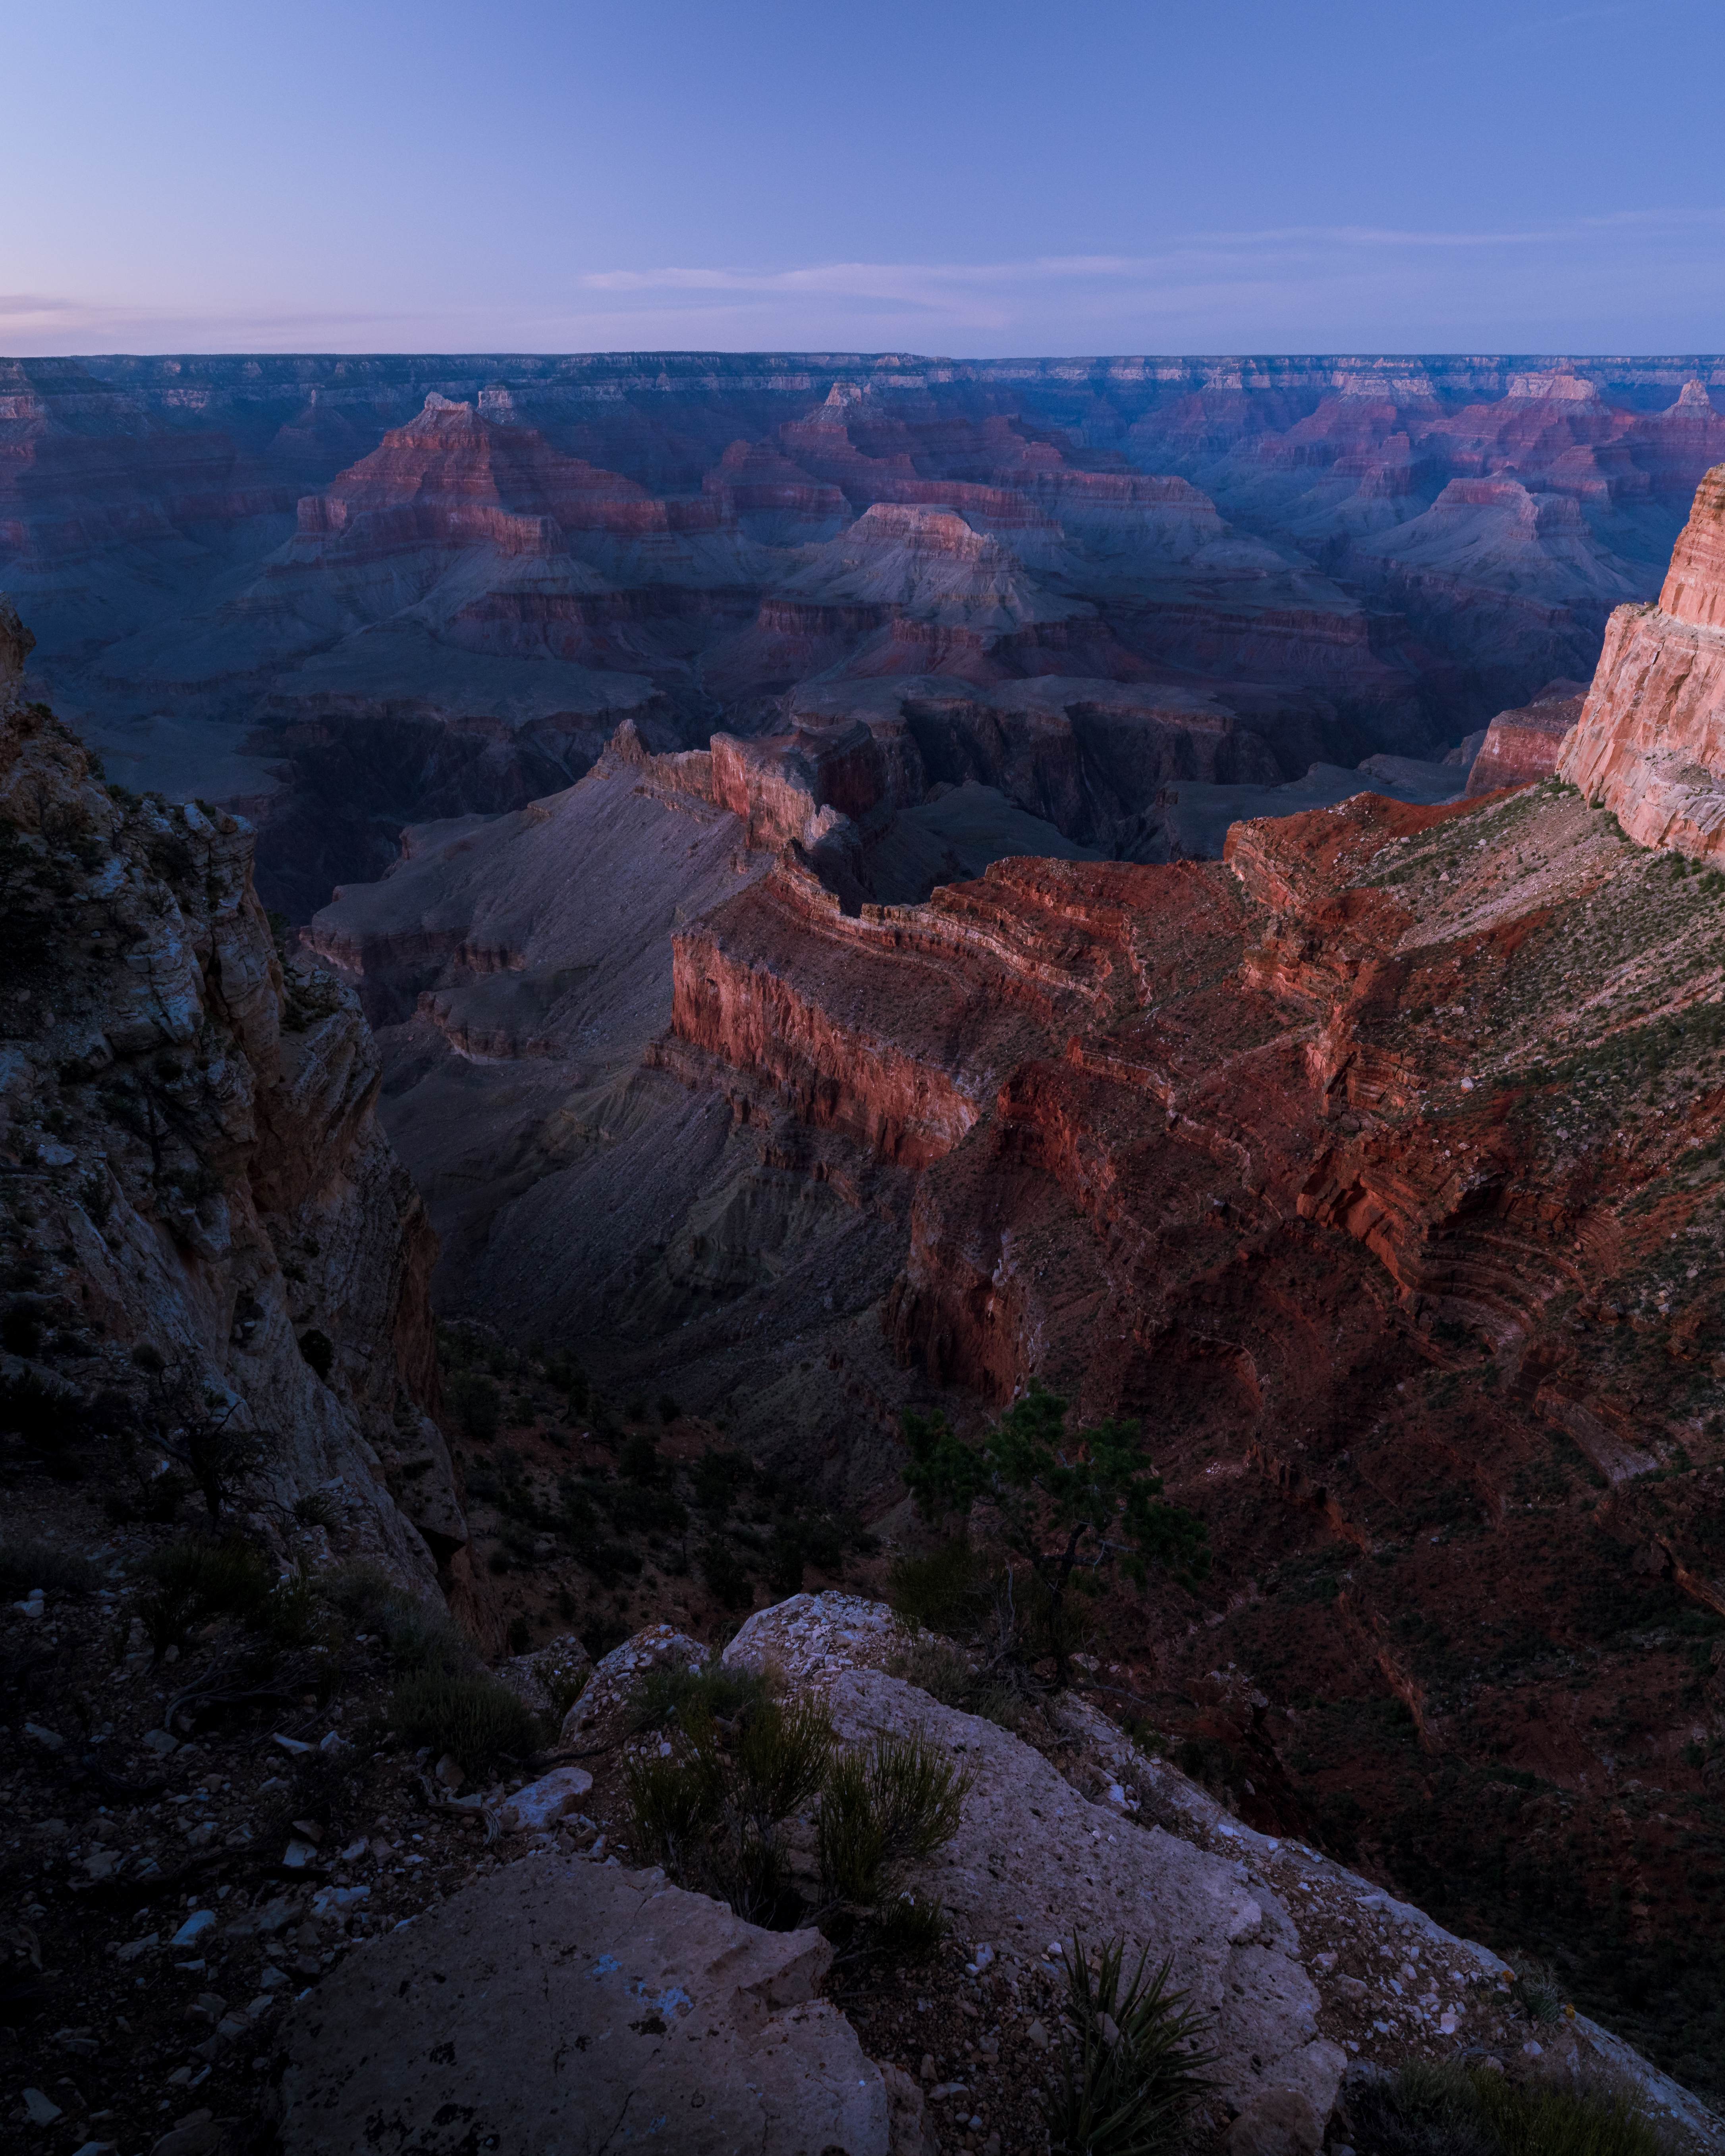
Try to arrive before sunrise. In my personal opinion, the blue hour shots right before the sun comes up are the best here — they create a blue haze effect in the canyon that's very scenic. Be ready with your composition, because this effect lasts only about 10 minutes: the light changes dramatically due to the huge, sharp elevation differences in the canyon. The same goes for sunsets — I find blue hour scenes more compelling overall, but that's just my personal preference.
Another tip: for my first sunset I went to Mojave Point on a red bus and tried to shoot west, pointing my camera toward the sun. That can work if you have a specific idea in mind, but in general I find that shooting in the opposite direction from the sun gives you much more interesting light.
One more: you might have watched YouTube videos or read other blogs to find inspiration for your Grand Canyon photography, which is very useful — but never expect to catch the same scene someone else got. The Grand Canyon is very unpredictable in terms of weather, clouds, and light. I had multiple conversations with other photographers during my trip, and my conclusion is that the Grand Canyon is a good tester of your photography skills and capabilities. You might have a certain picture in mind, and when you arrive at the location it can look absolutely different — be flexible and don't get tunnel vision. There are plenty of shots in one location that many people overlook. Listen to your gut and experiment if what you planned is clearly not going to work. This happened to me almost every day of my trip.
A last tip: try to schedule your trip so you'll have little to no moonlight. The Grand Canyon is a certified Dark Sky location, and if you're into astrophotography that's a great opportunity for some amazing shots. I got unlucky there — the only dates available for my permit were during a full moon.
The North Rim — what the fire left behind
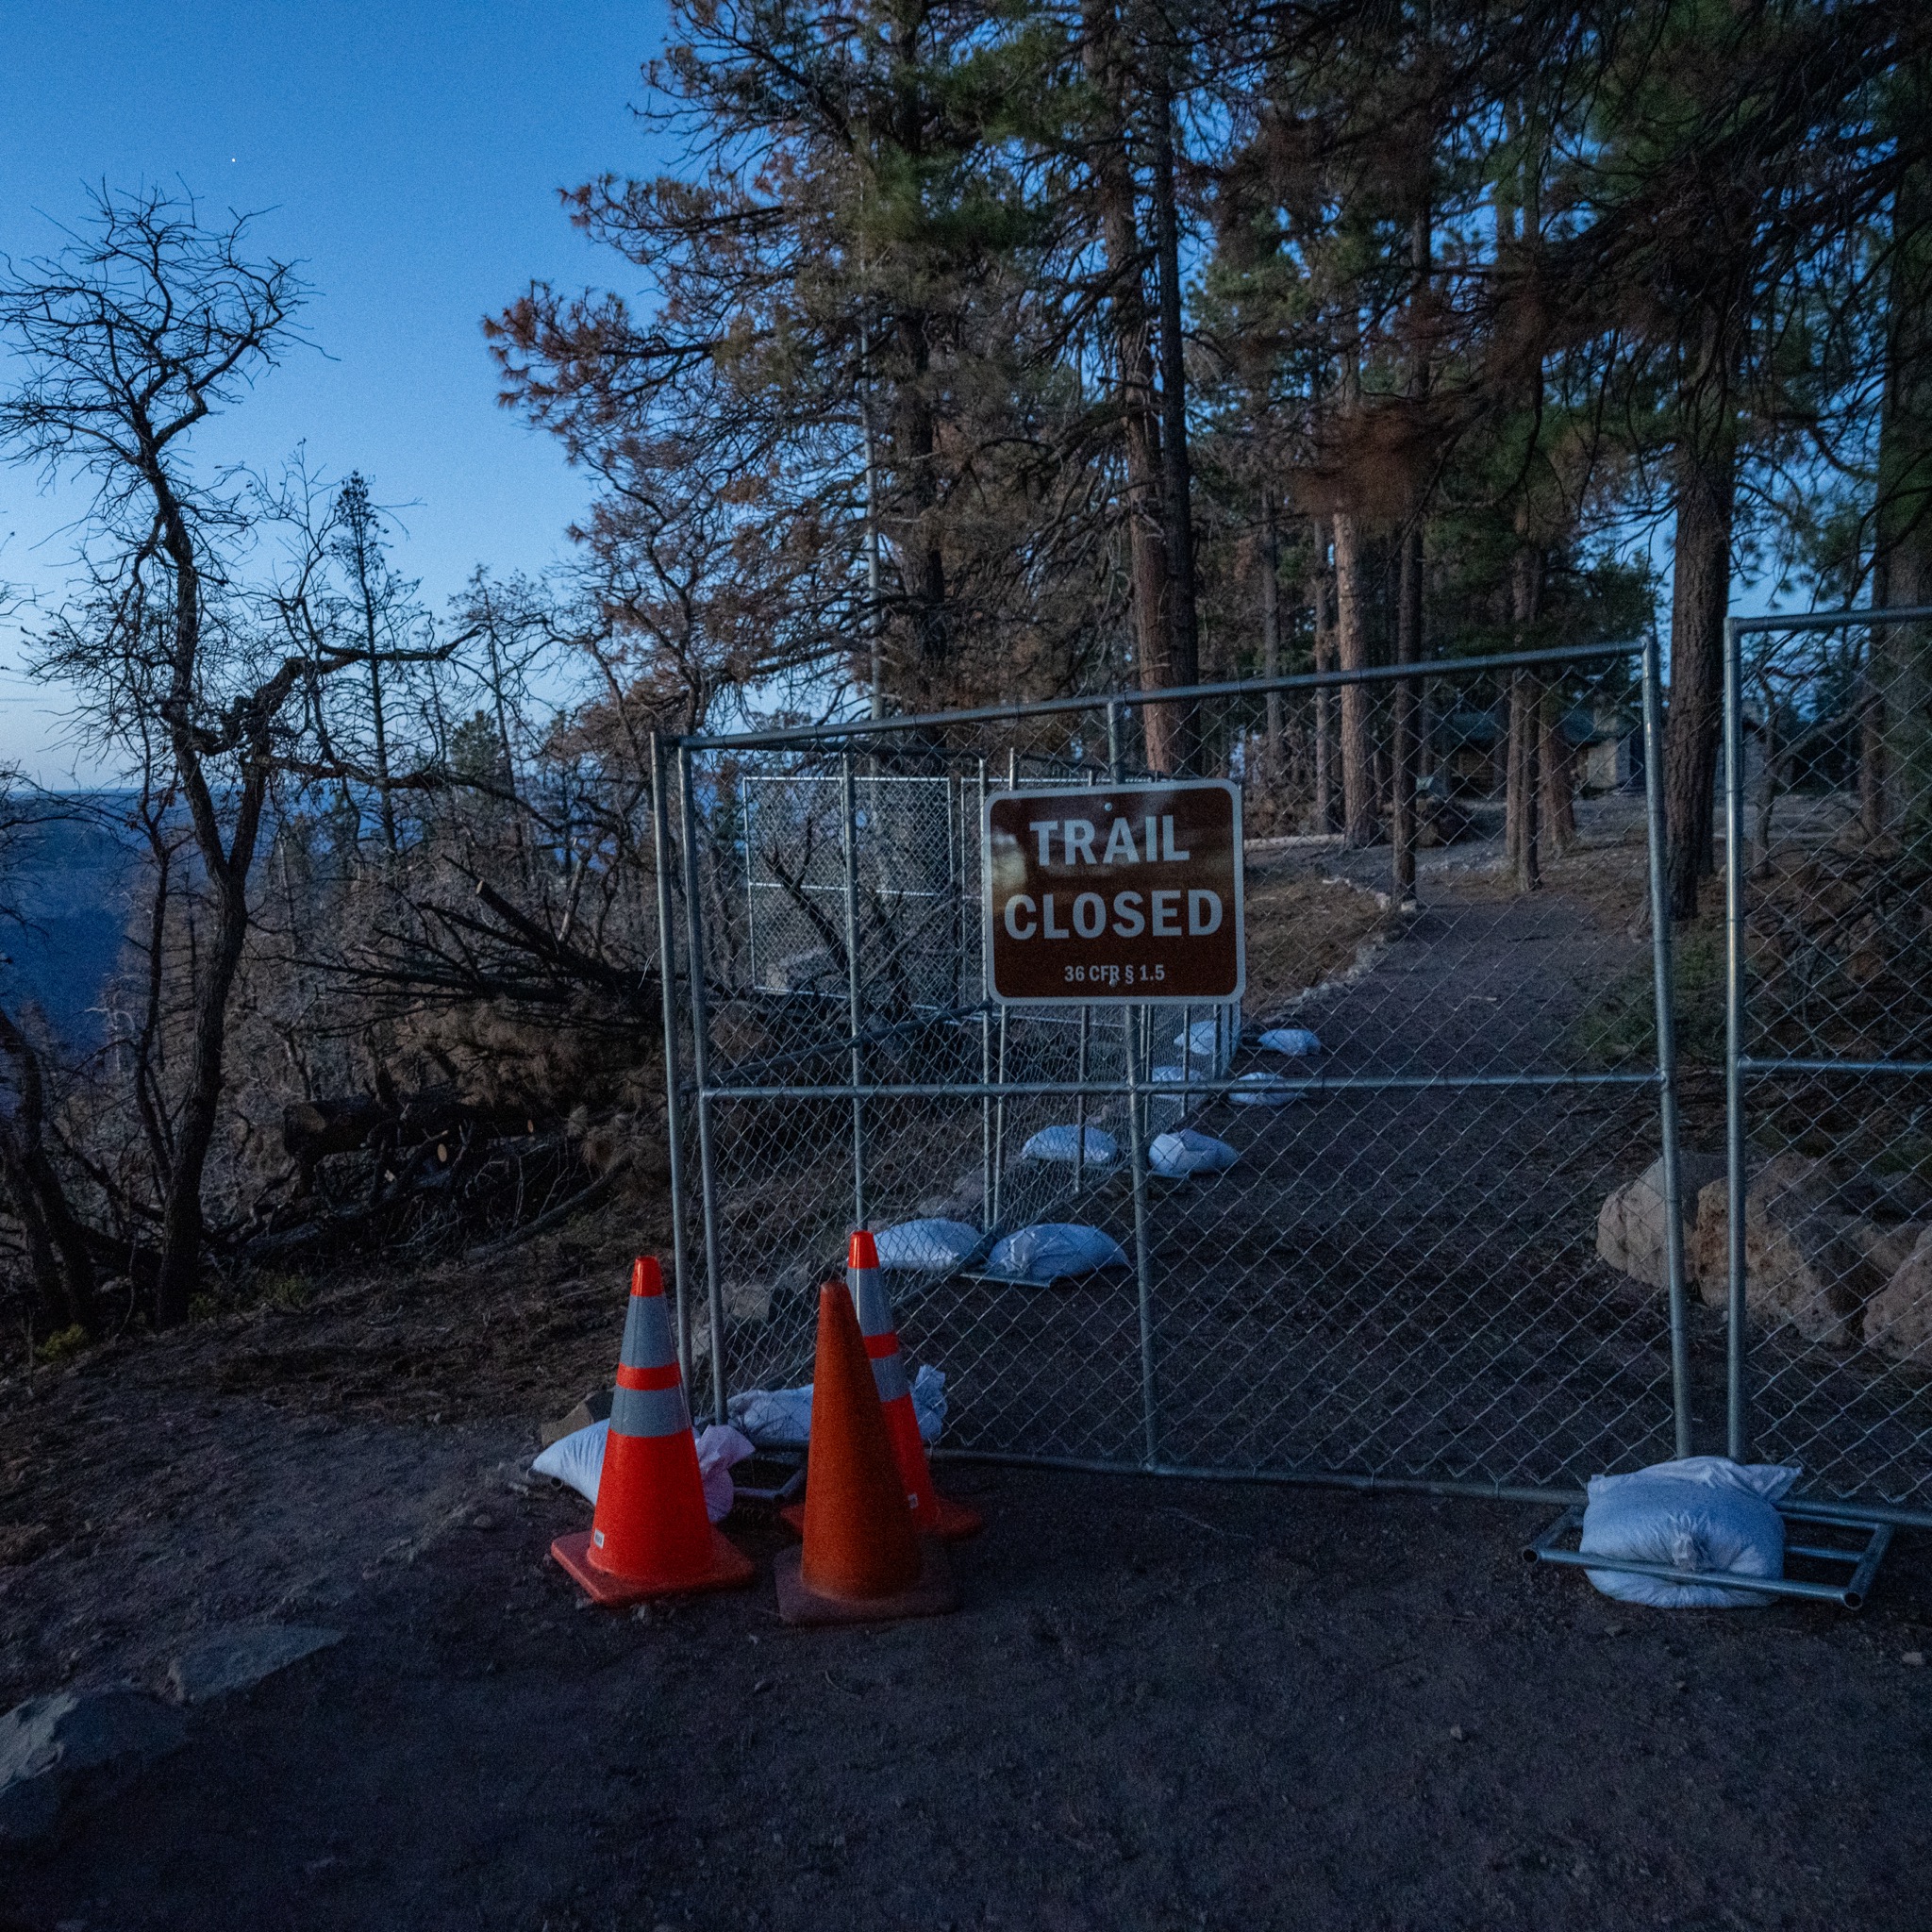
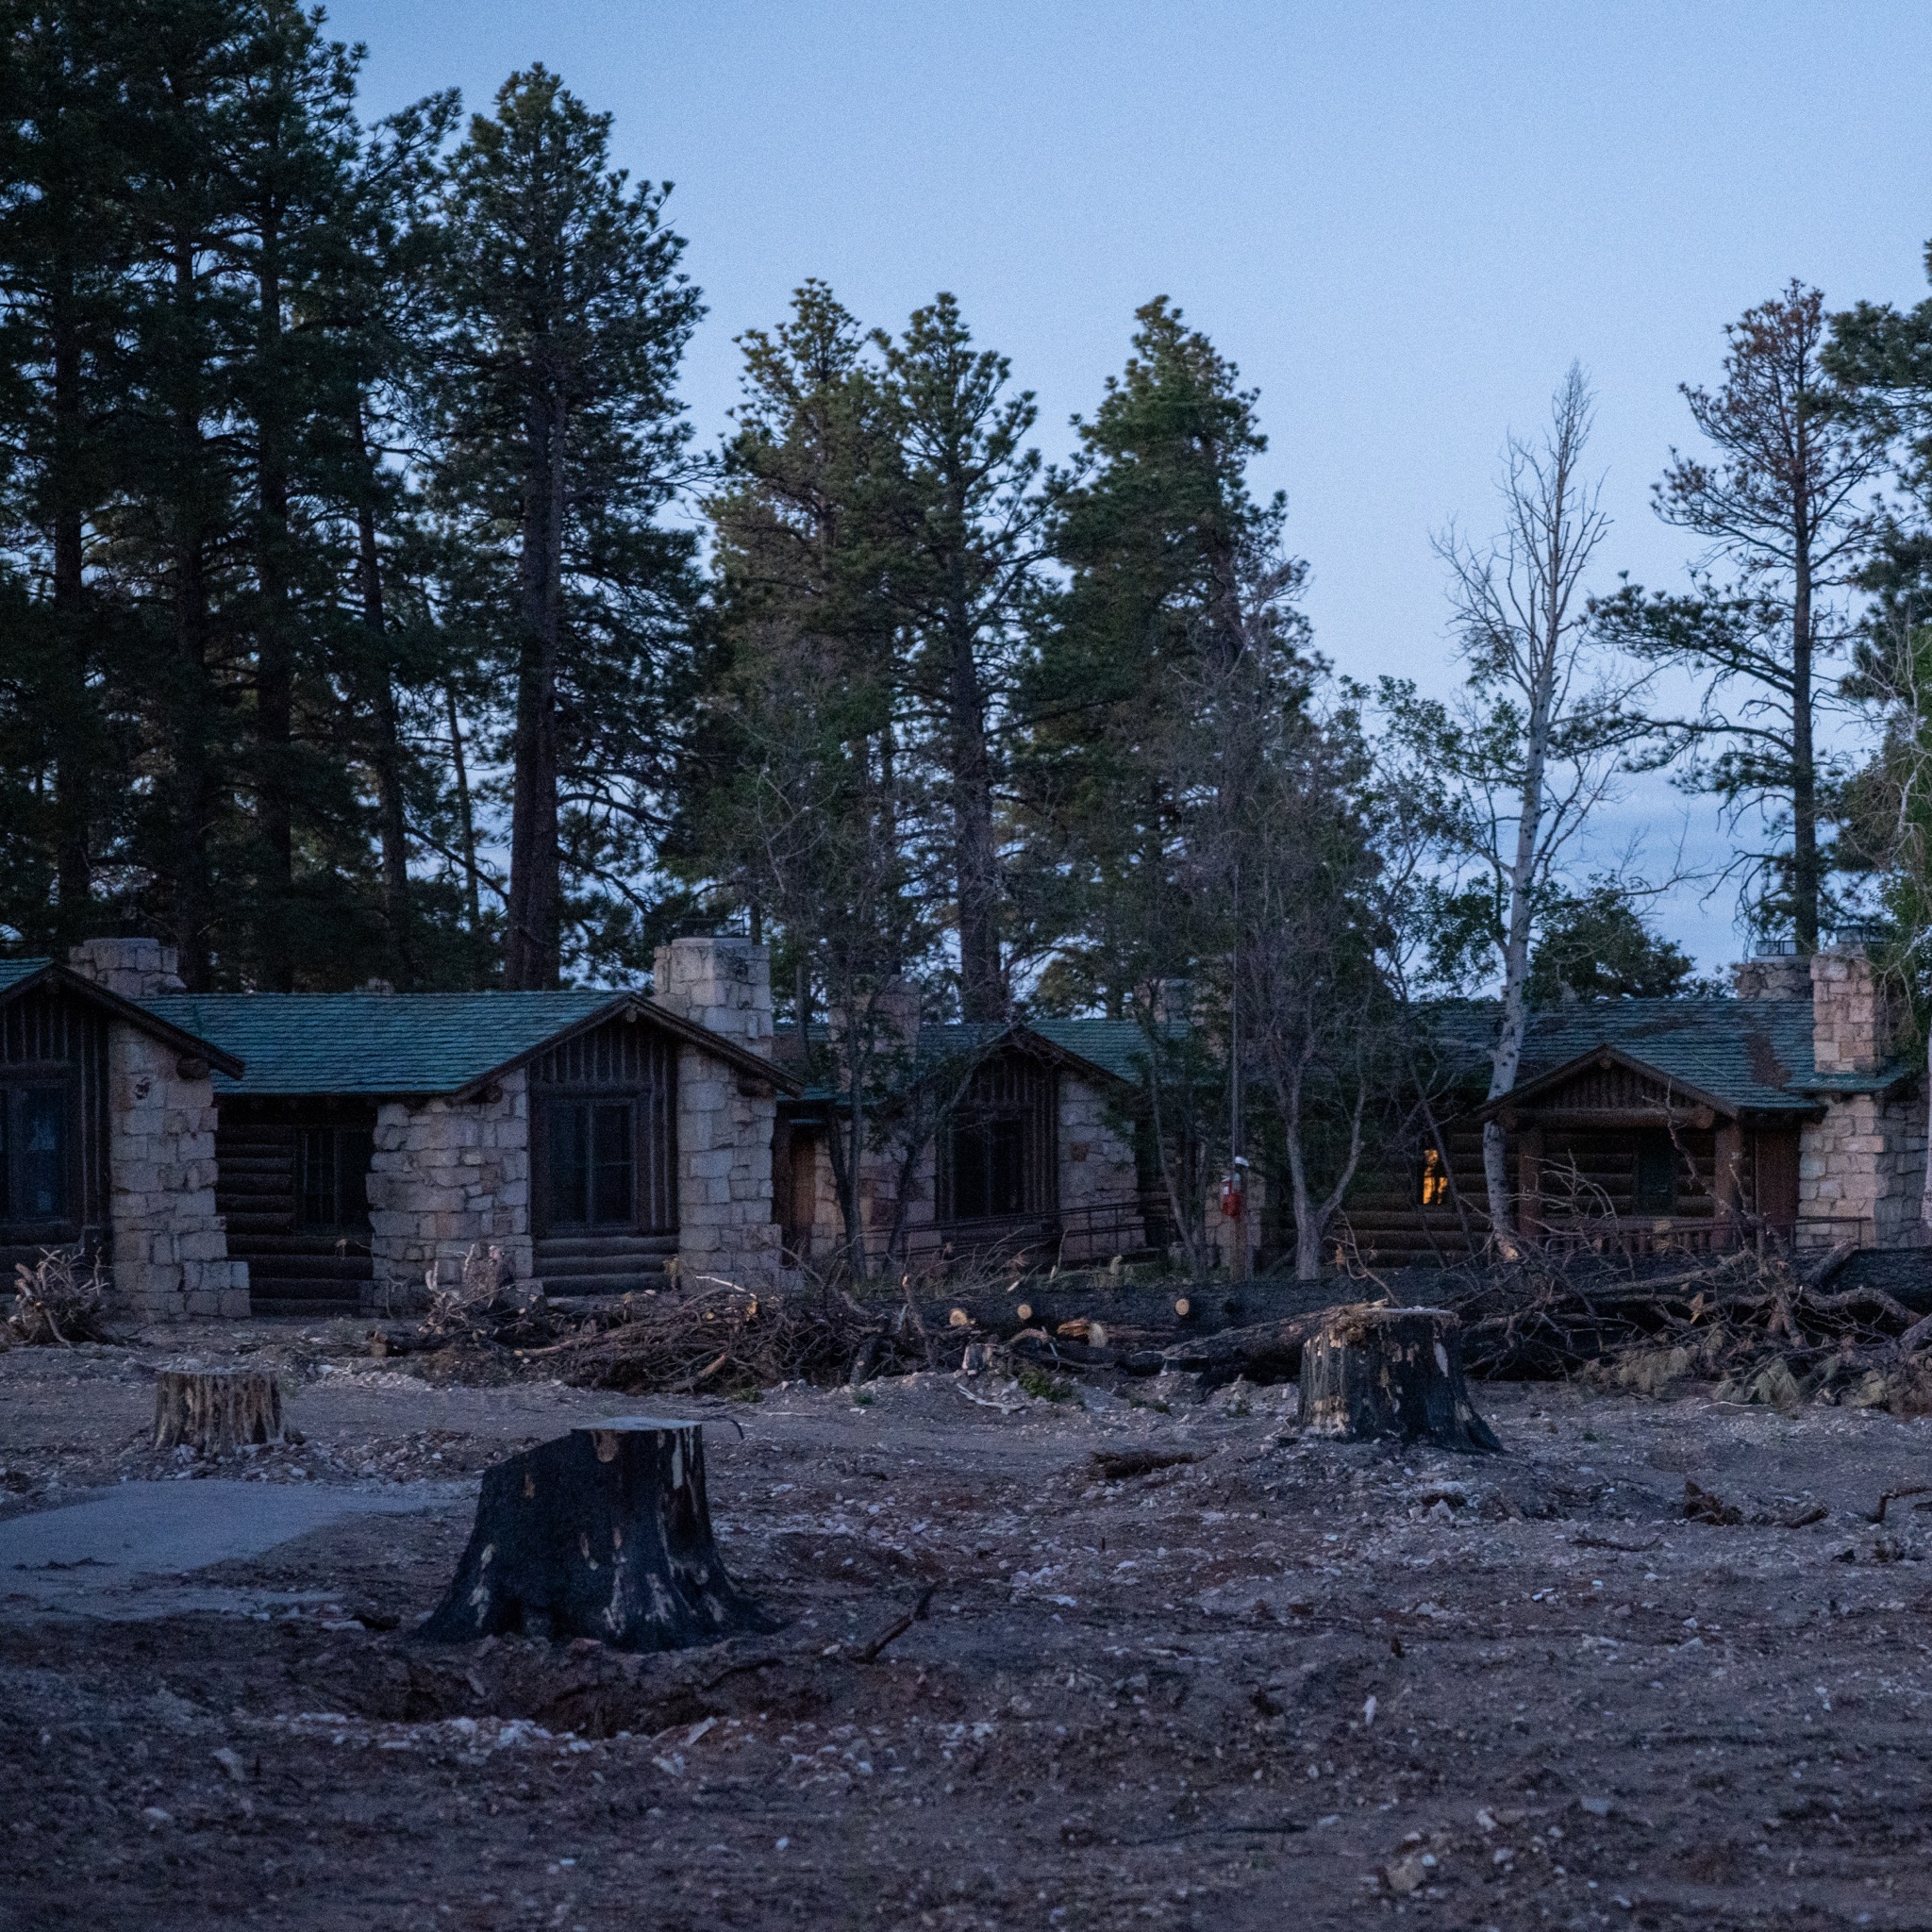
Before starting the hike, I wanted to photograph what was left of the North Rim village after the fire. I asked a shuttle driver to give me a hitch there, but it didn't work out as planned — everything was fenced off. You could see how the buildings had burned, trees had been chopped down, and embers were still scattered everywhere. I'd hoped to take some shots of the burned village, but with the closures I had to move on to the trailhead.
The driver told me the story behind it. A lot of people hadn't expected the Park to open the trail this year at all — there was gossip among influencers and podcasters that it would take about five years to reopen. According to him, that was nonsensical: the canyon got lucky with a low-snow winter, which left enough time to make the trail operational. He felt the NPS could have done a better job communicating that, but, in his words, it is what it is. He was glad I wanted to tell more people about what's actually happening on the North Rim — so here it is.
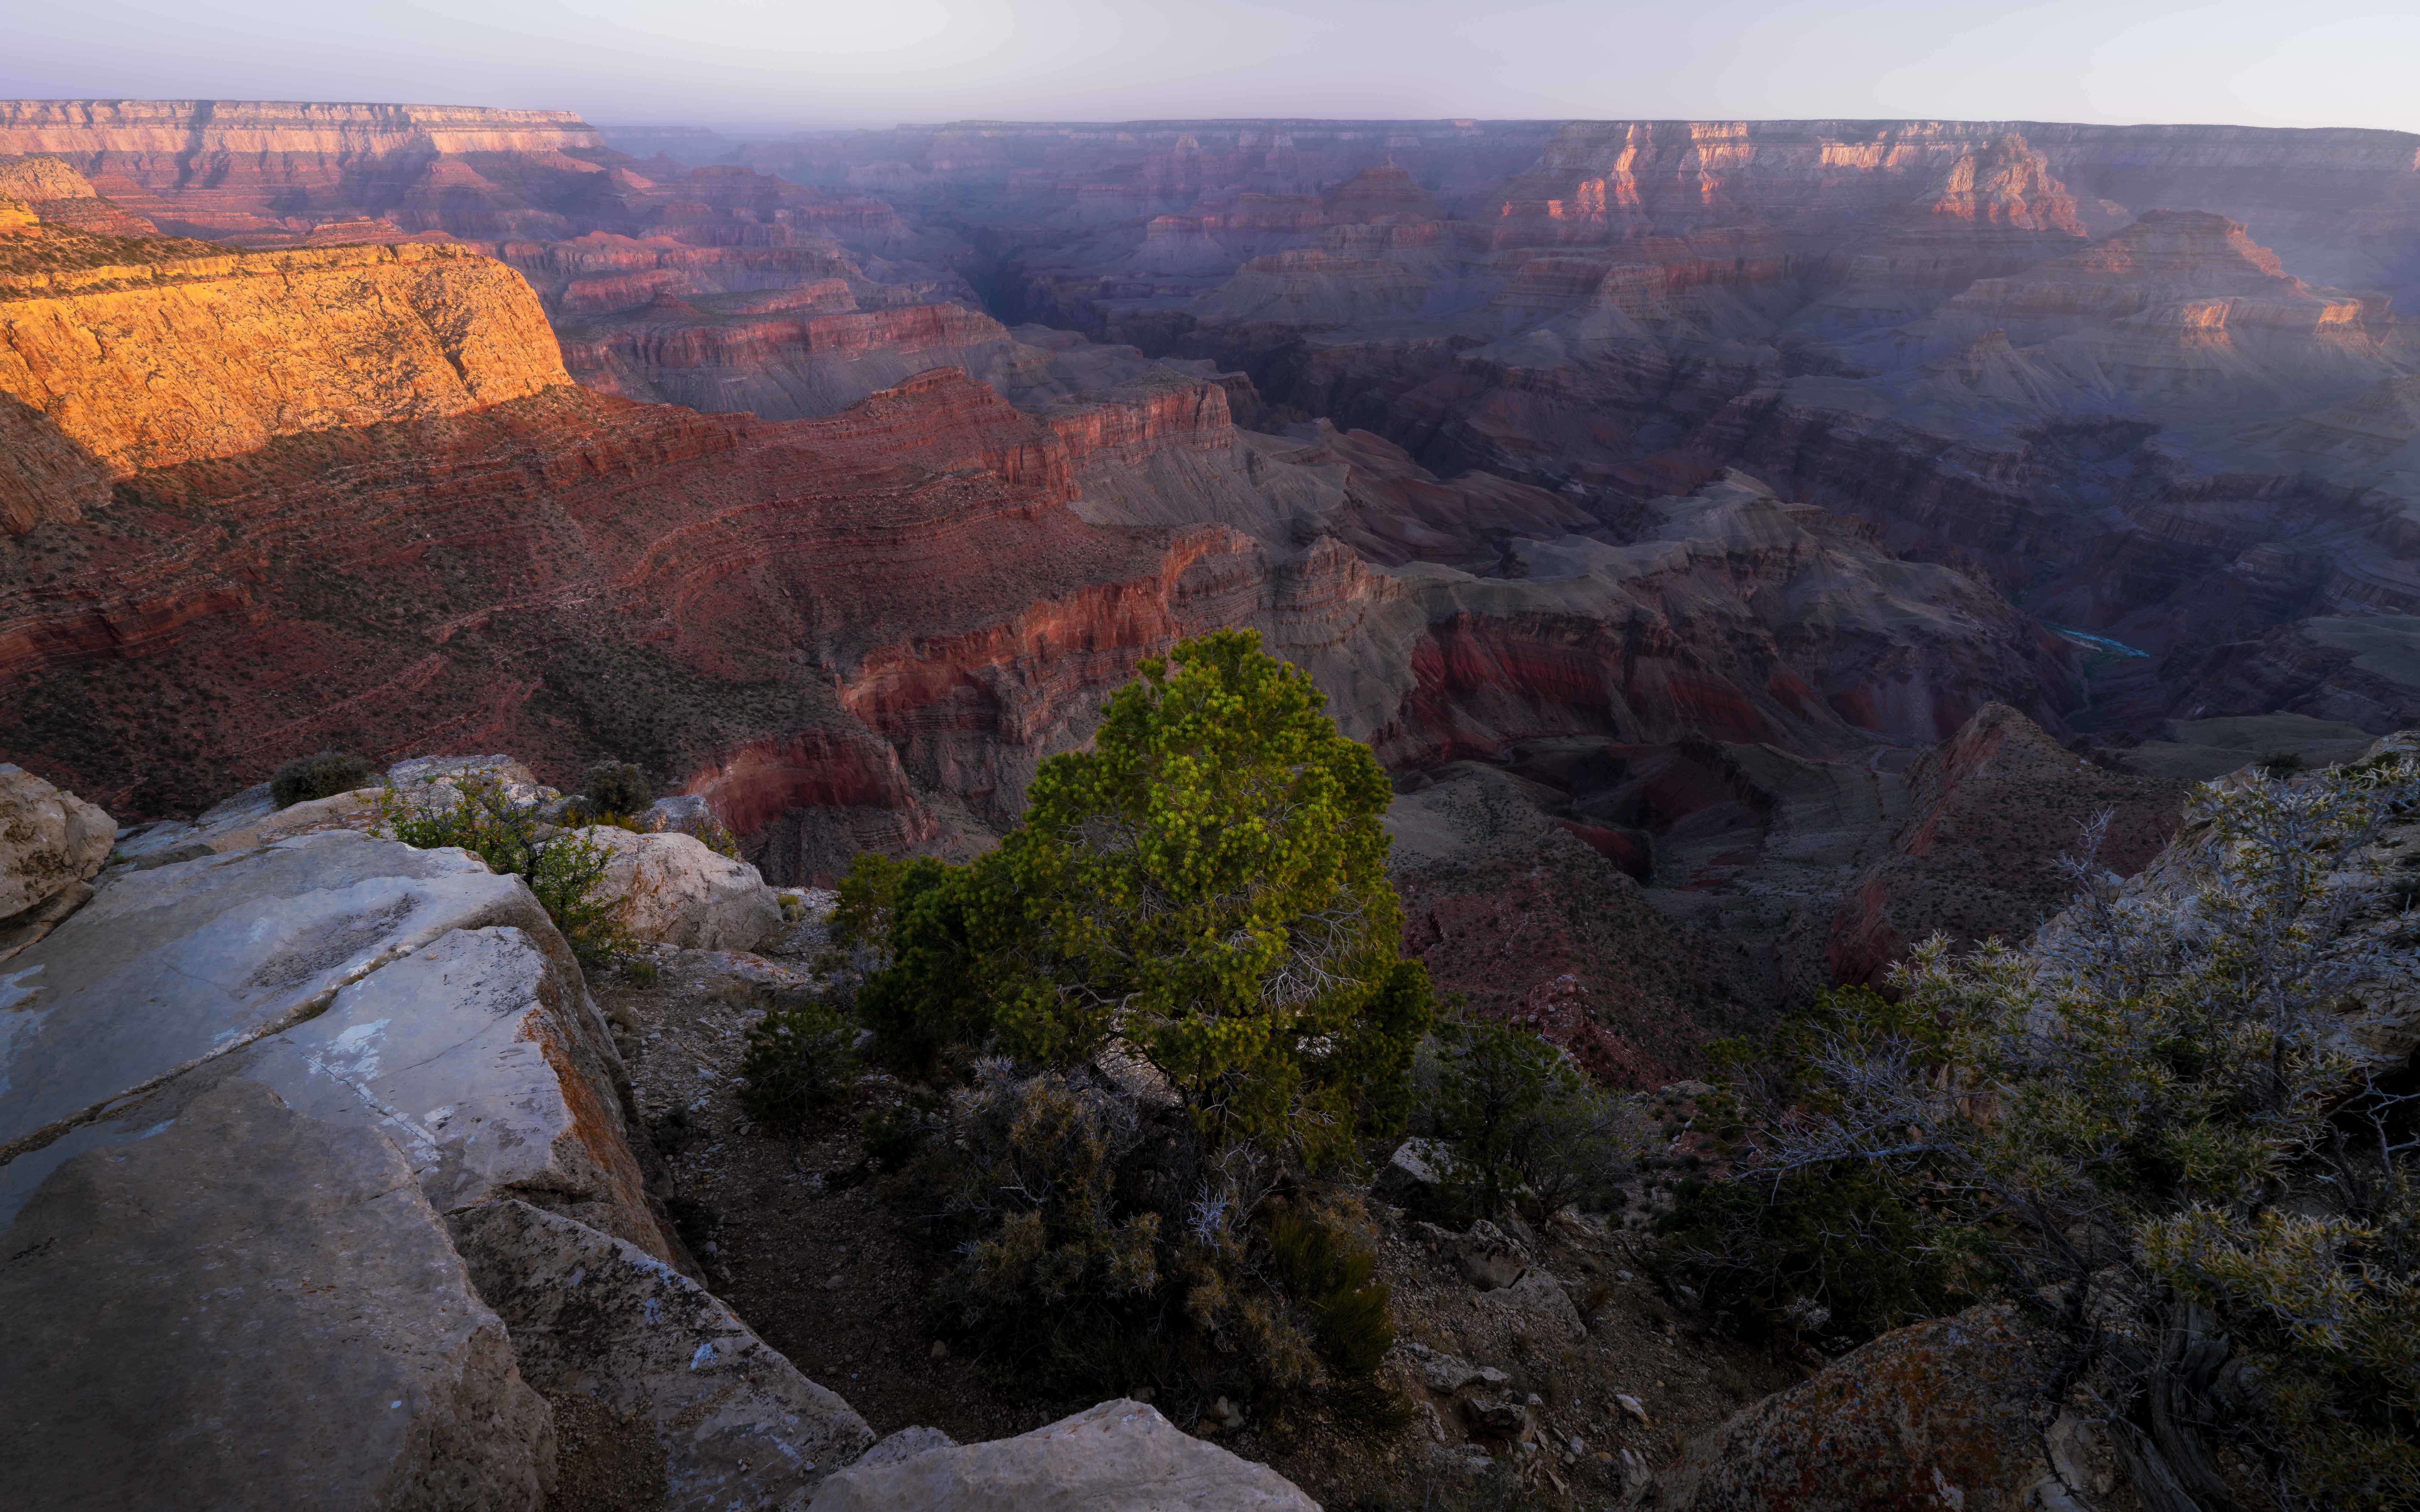
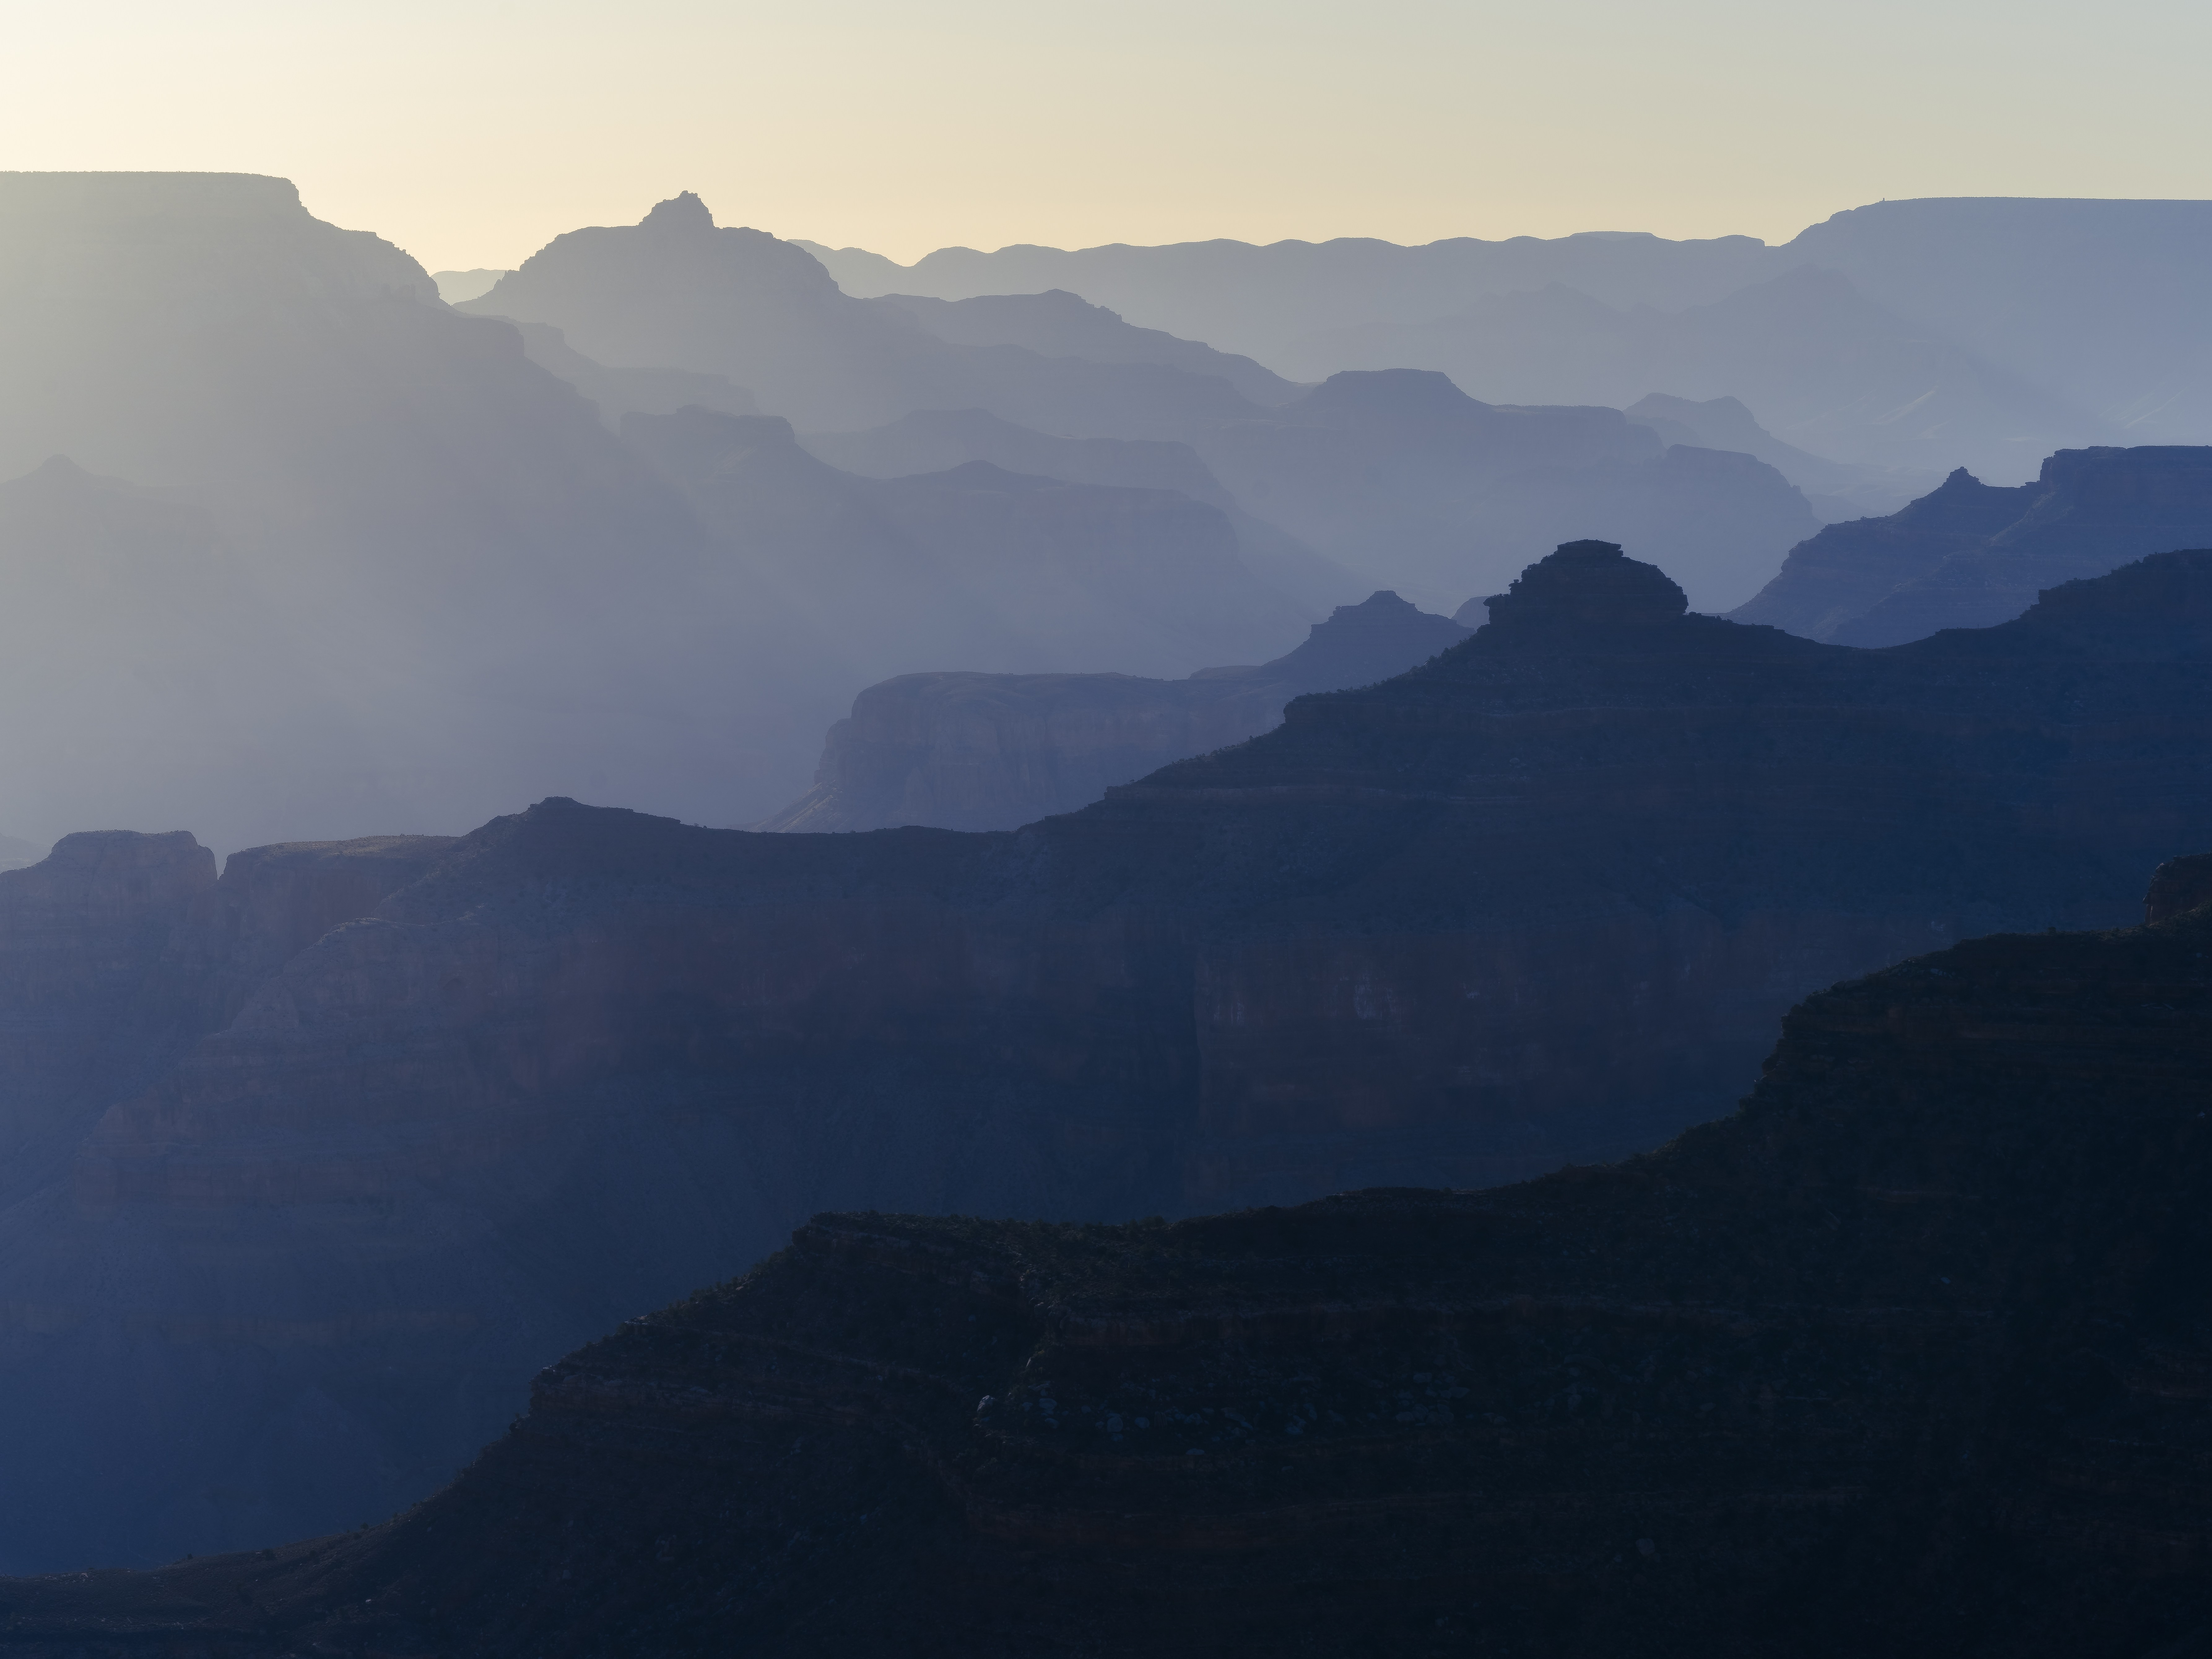
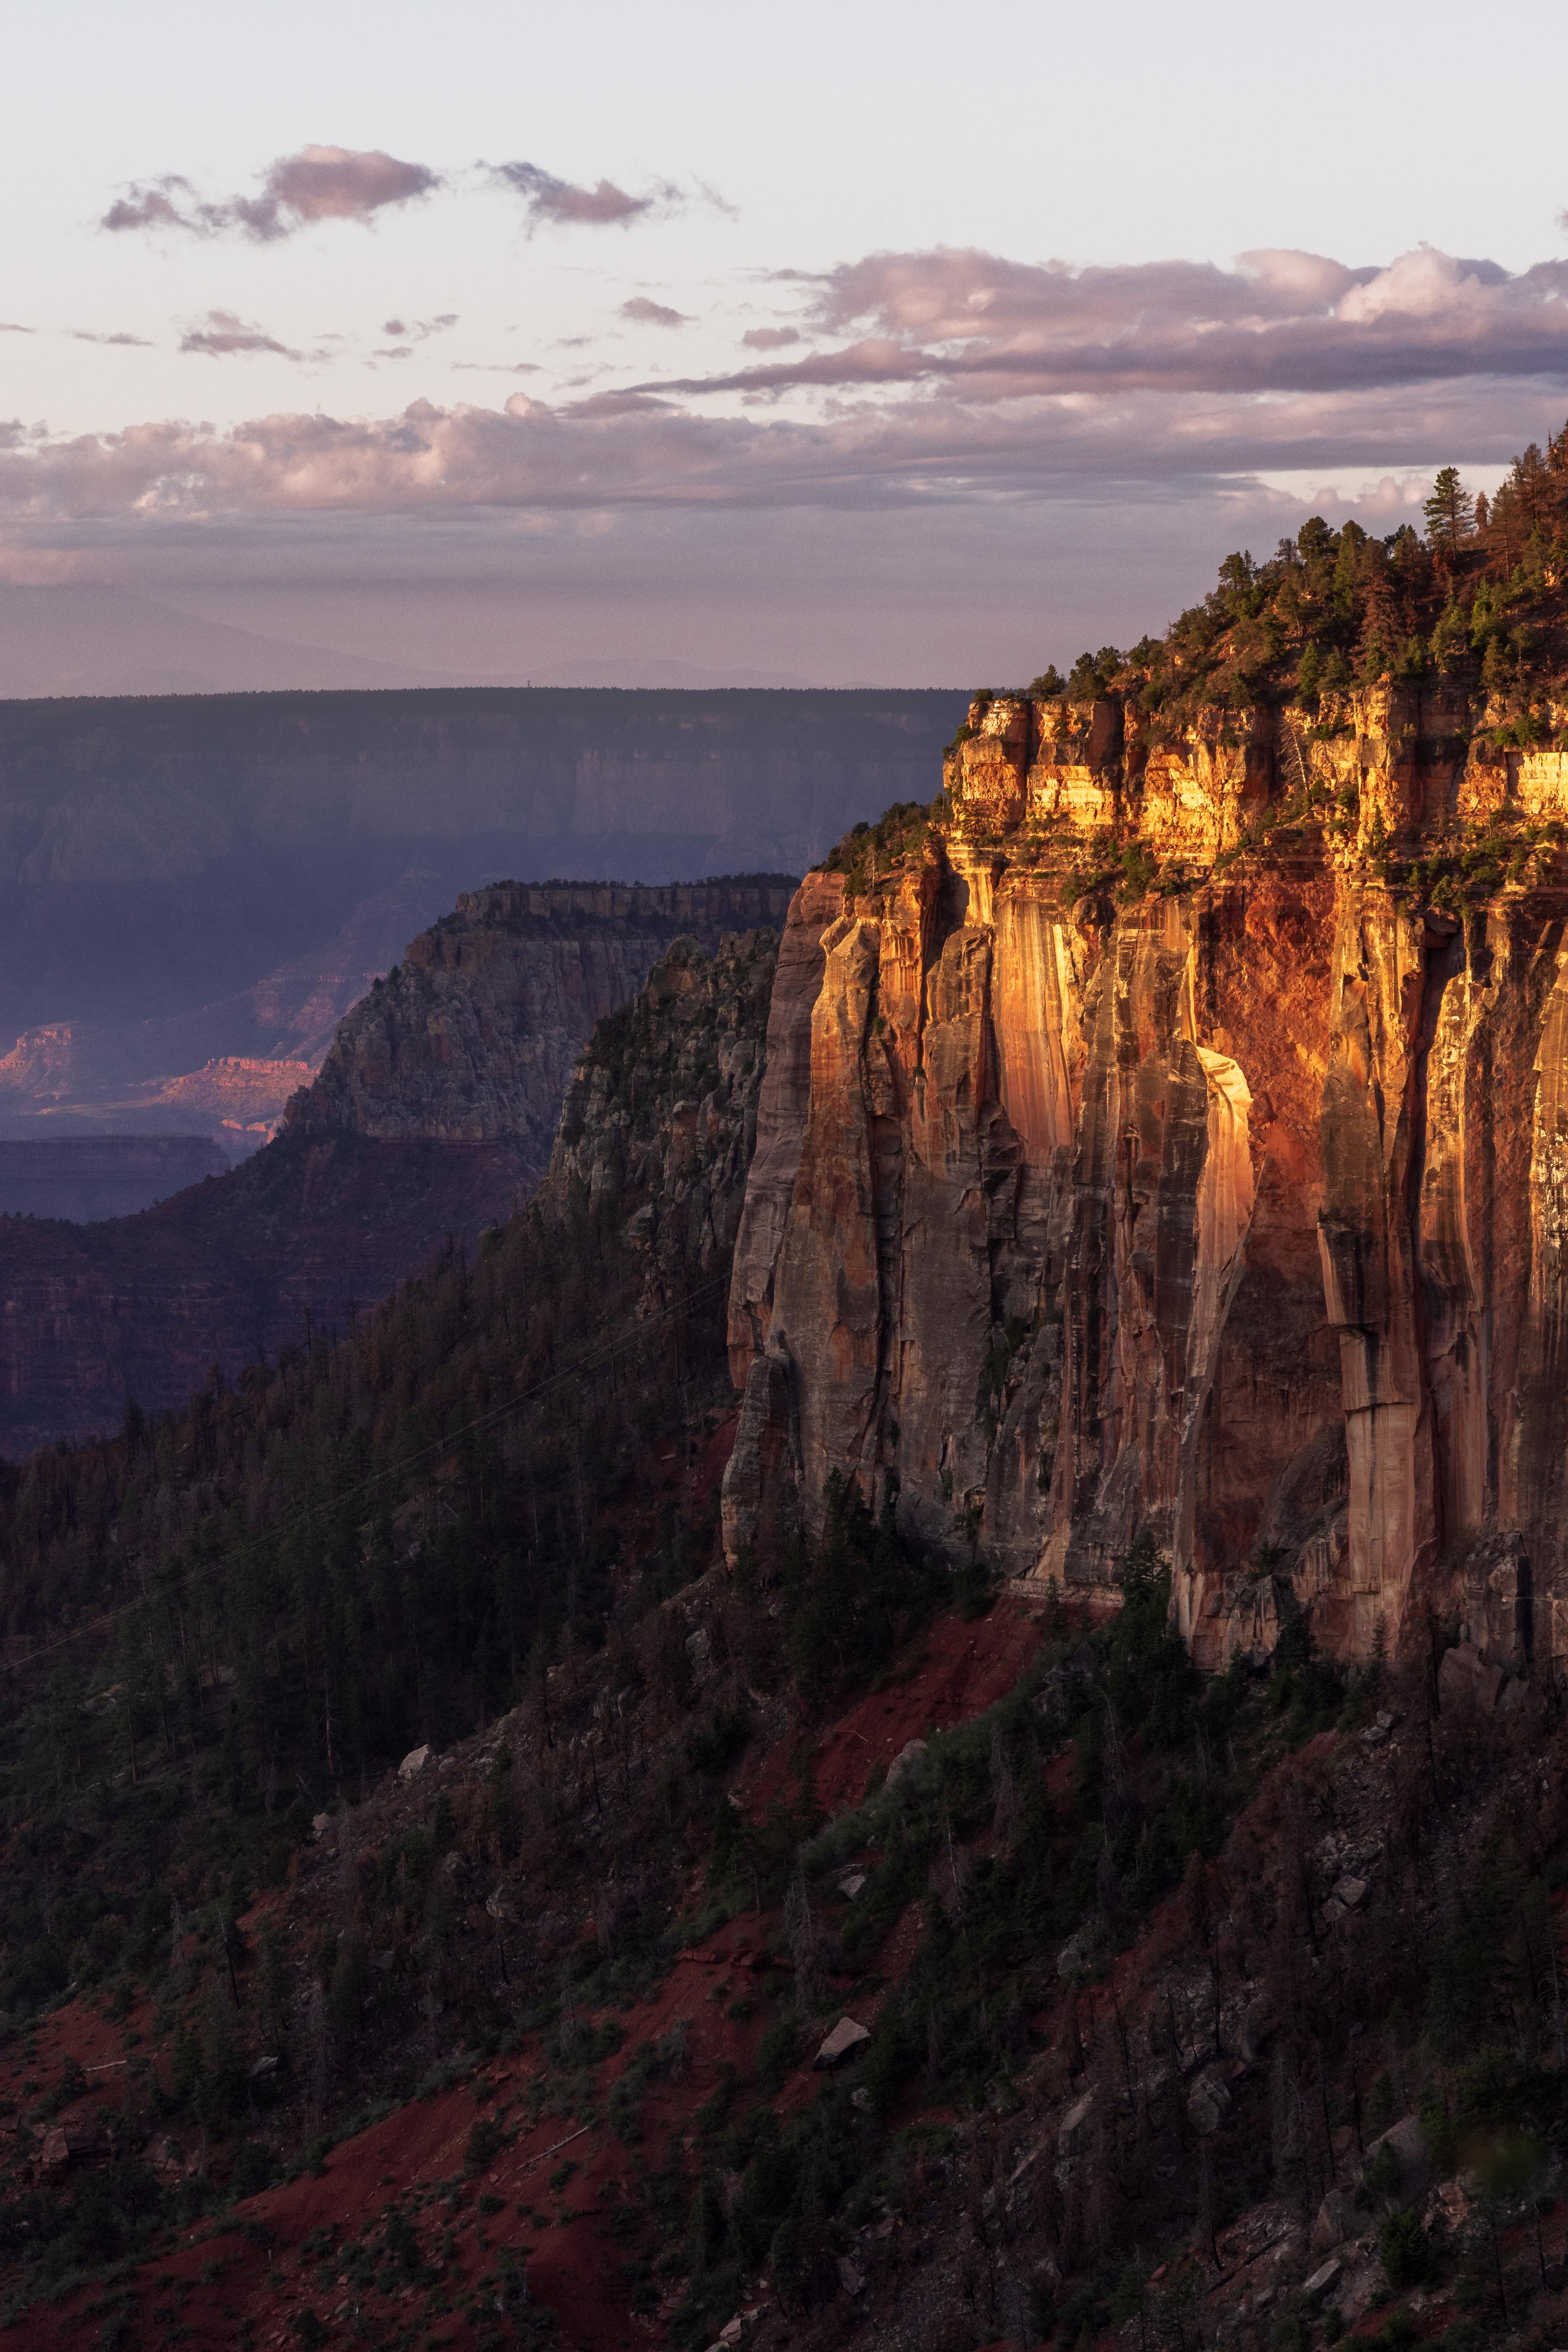
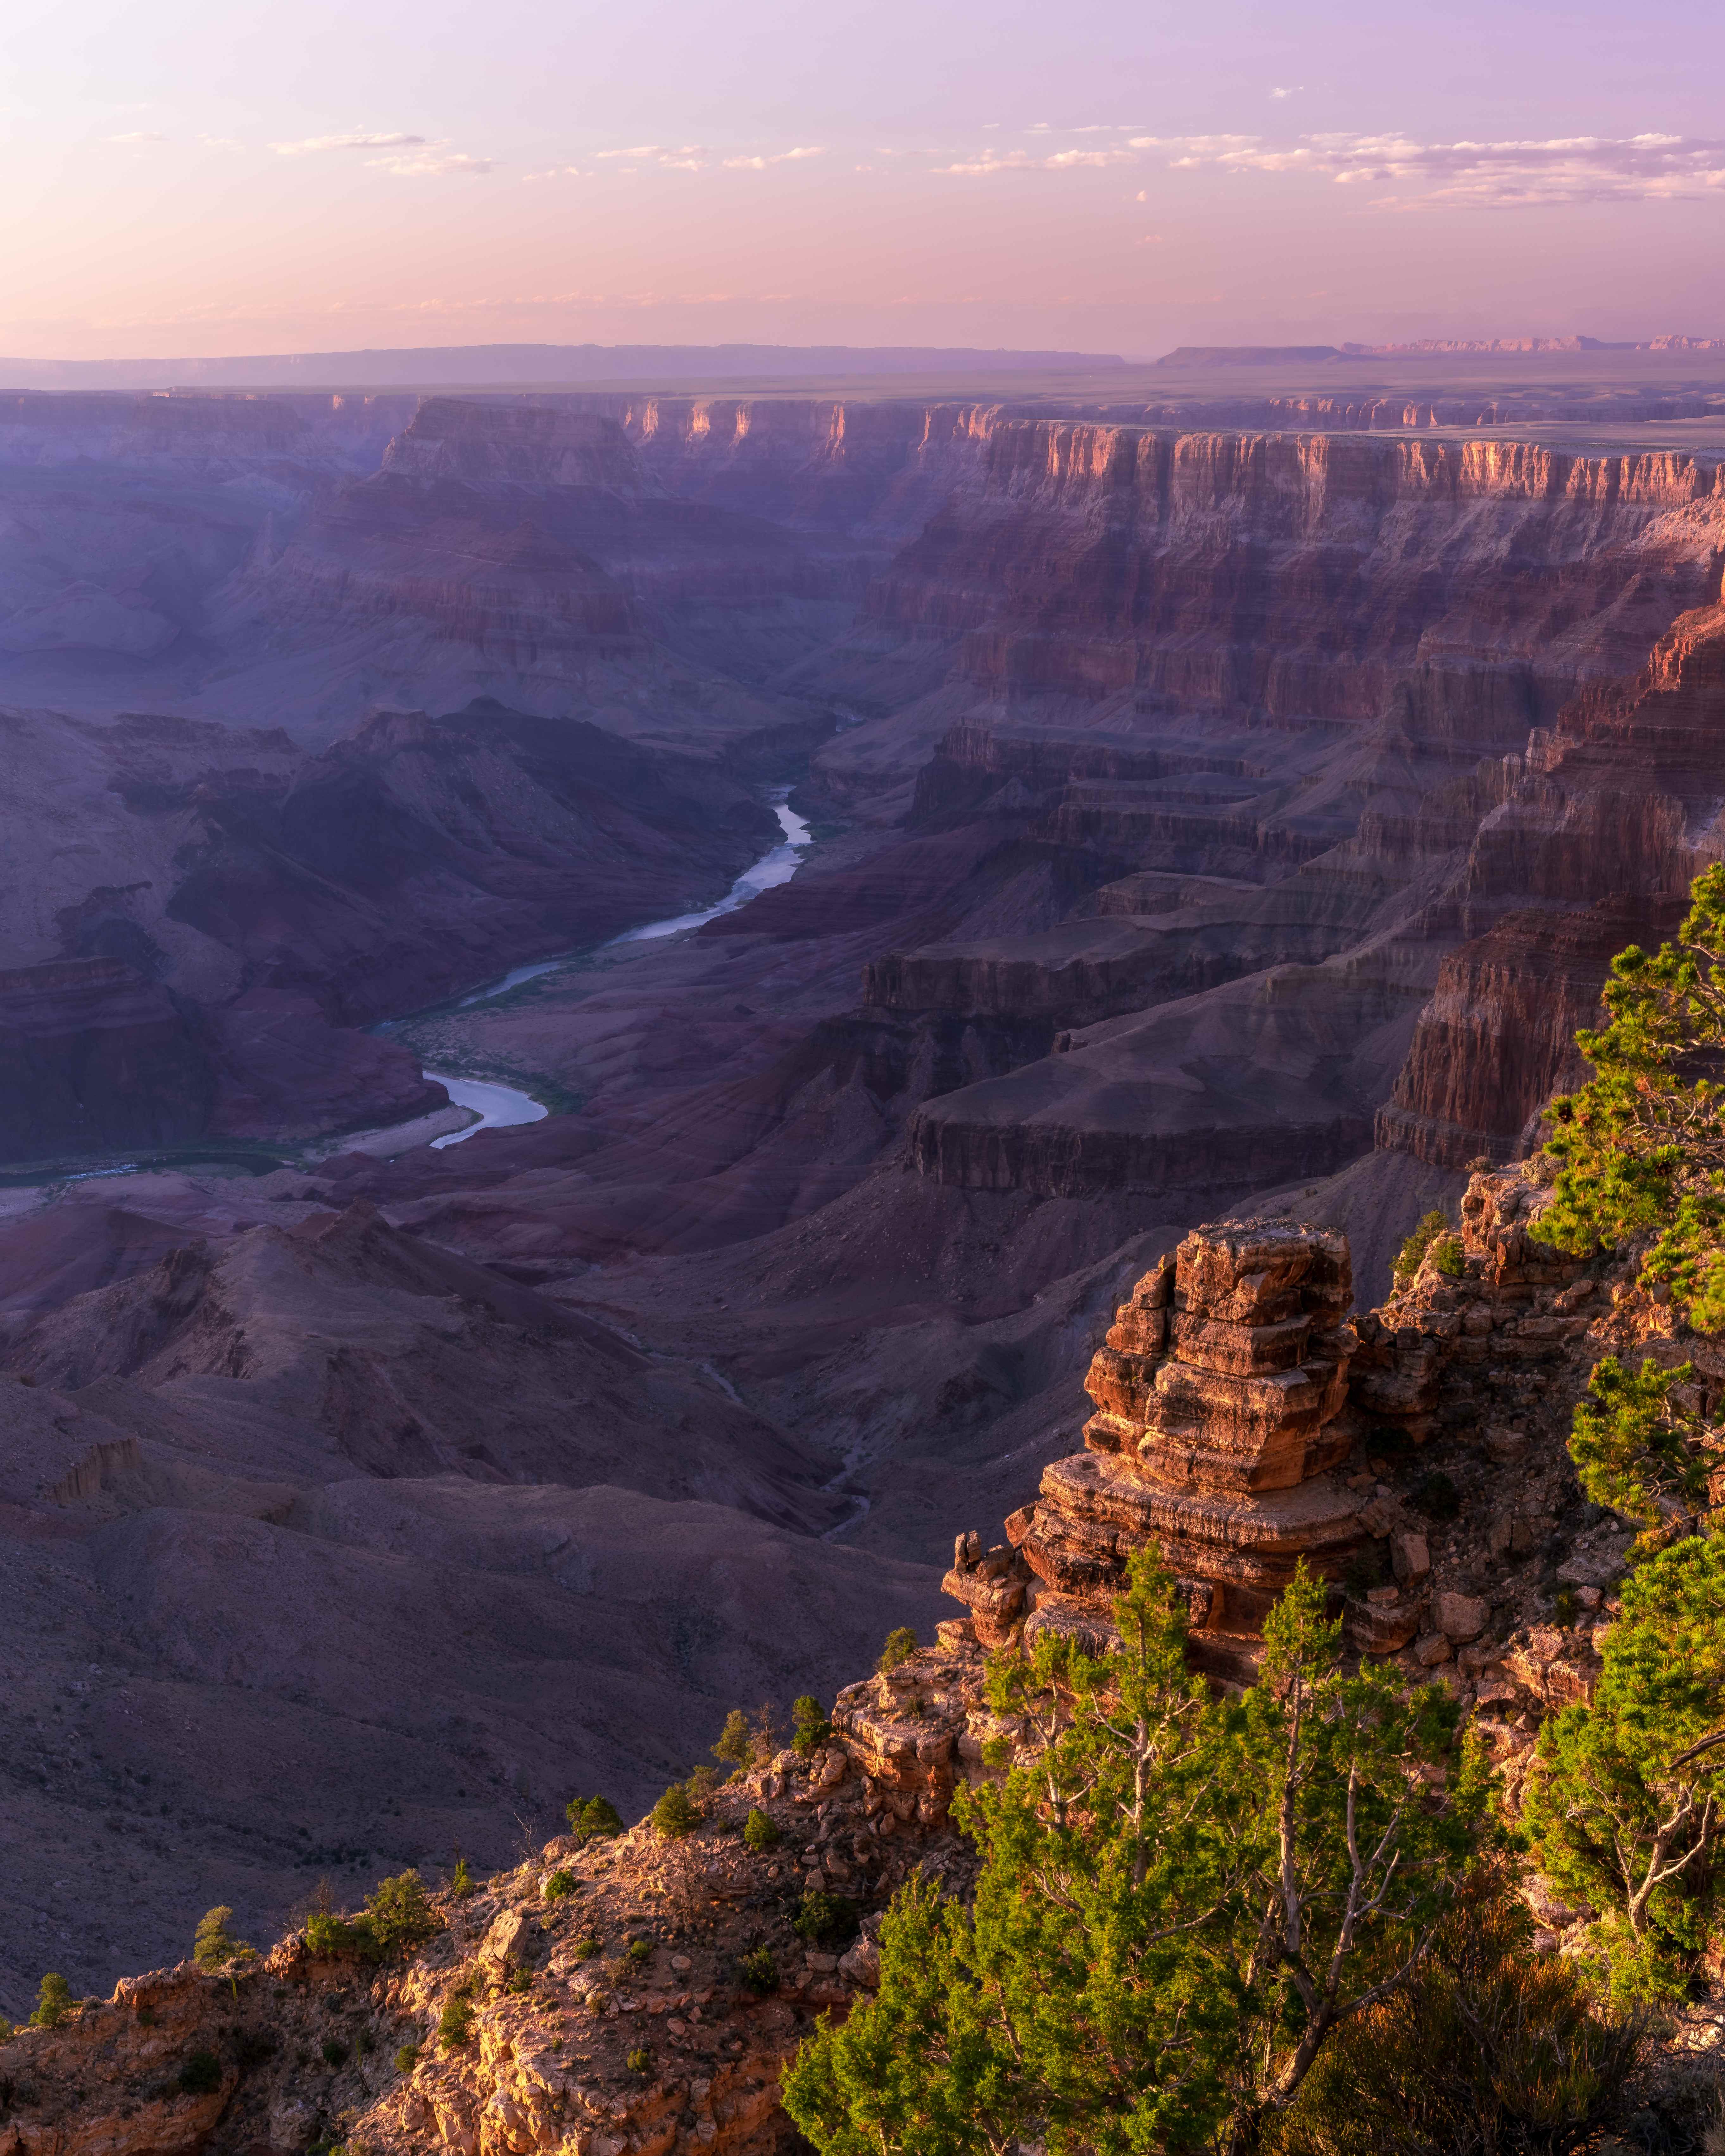
For all the damage at the rim's edge, the canyon itself is as staggering as ever — this is first light breaking over Coconino Overlook, the first viewpoint below the North Rim.
Hiking rim to rim: permits, water and heat
If you decide to do rim to rim, bring enough bottles to hold at least 4 liters of water, per ranger recommendations (I carried 4.5). I was lucky to get my permit this year, thanks to the maintenance work being done on the trail: I think many people didn't expect rim to rim to open this year, and when it did, the most convenient route — the Bright Angel Trail — was still closed. So I assume a lot of people just didn't want to do it, and my only option was the South Kaibab Trail, which has no water sources on it. In general, it's good practice to secure your permits 5–6 months in advance, since a 6-month window is the standard NPS release for both campground and backcountry reservations.
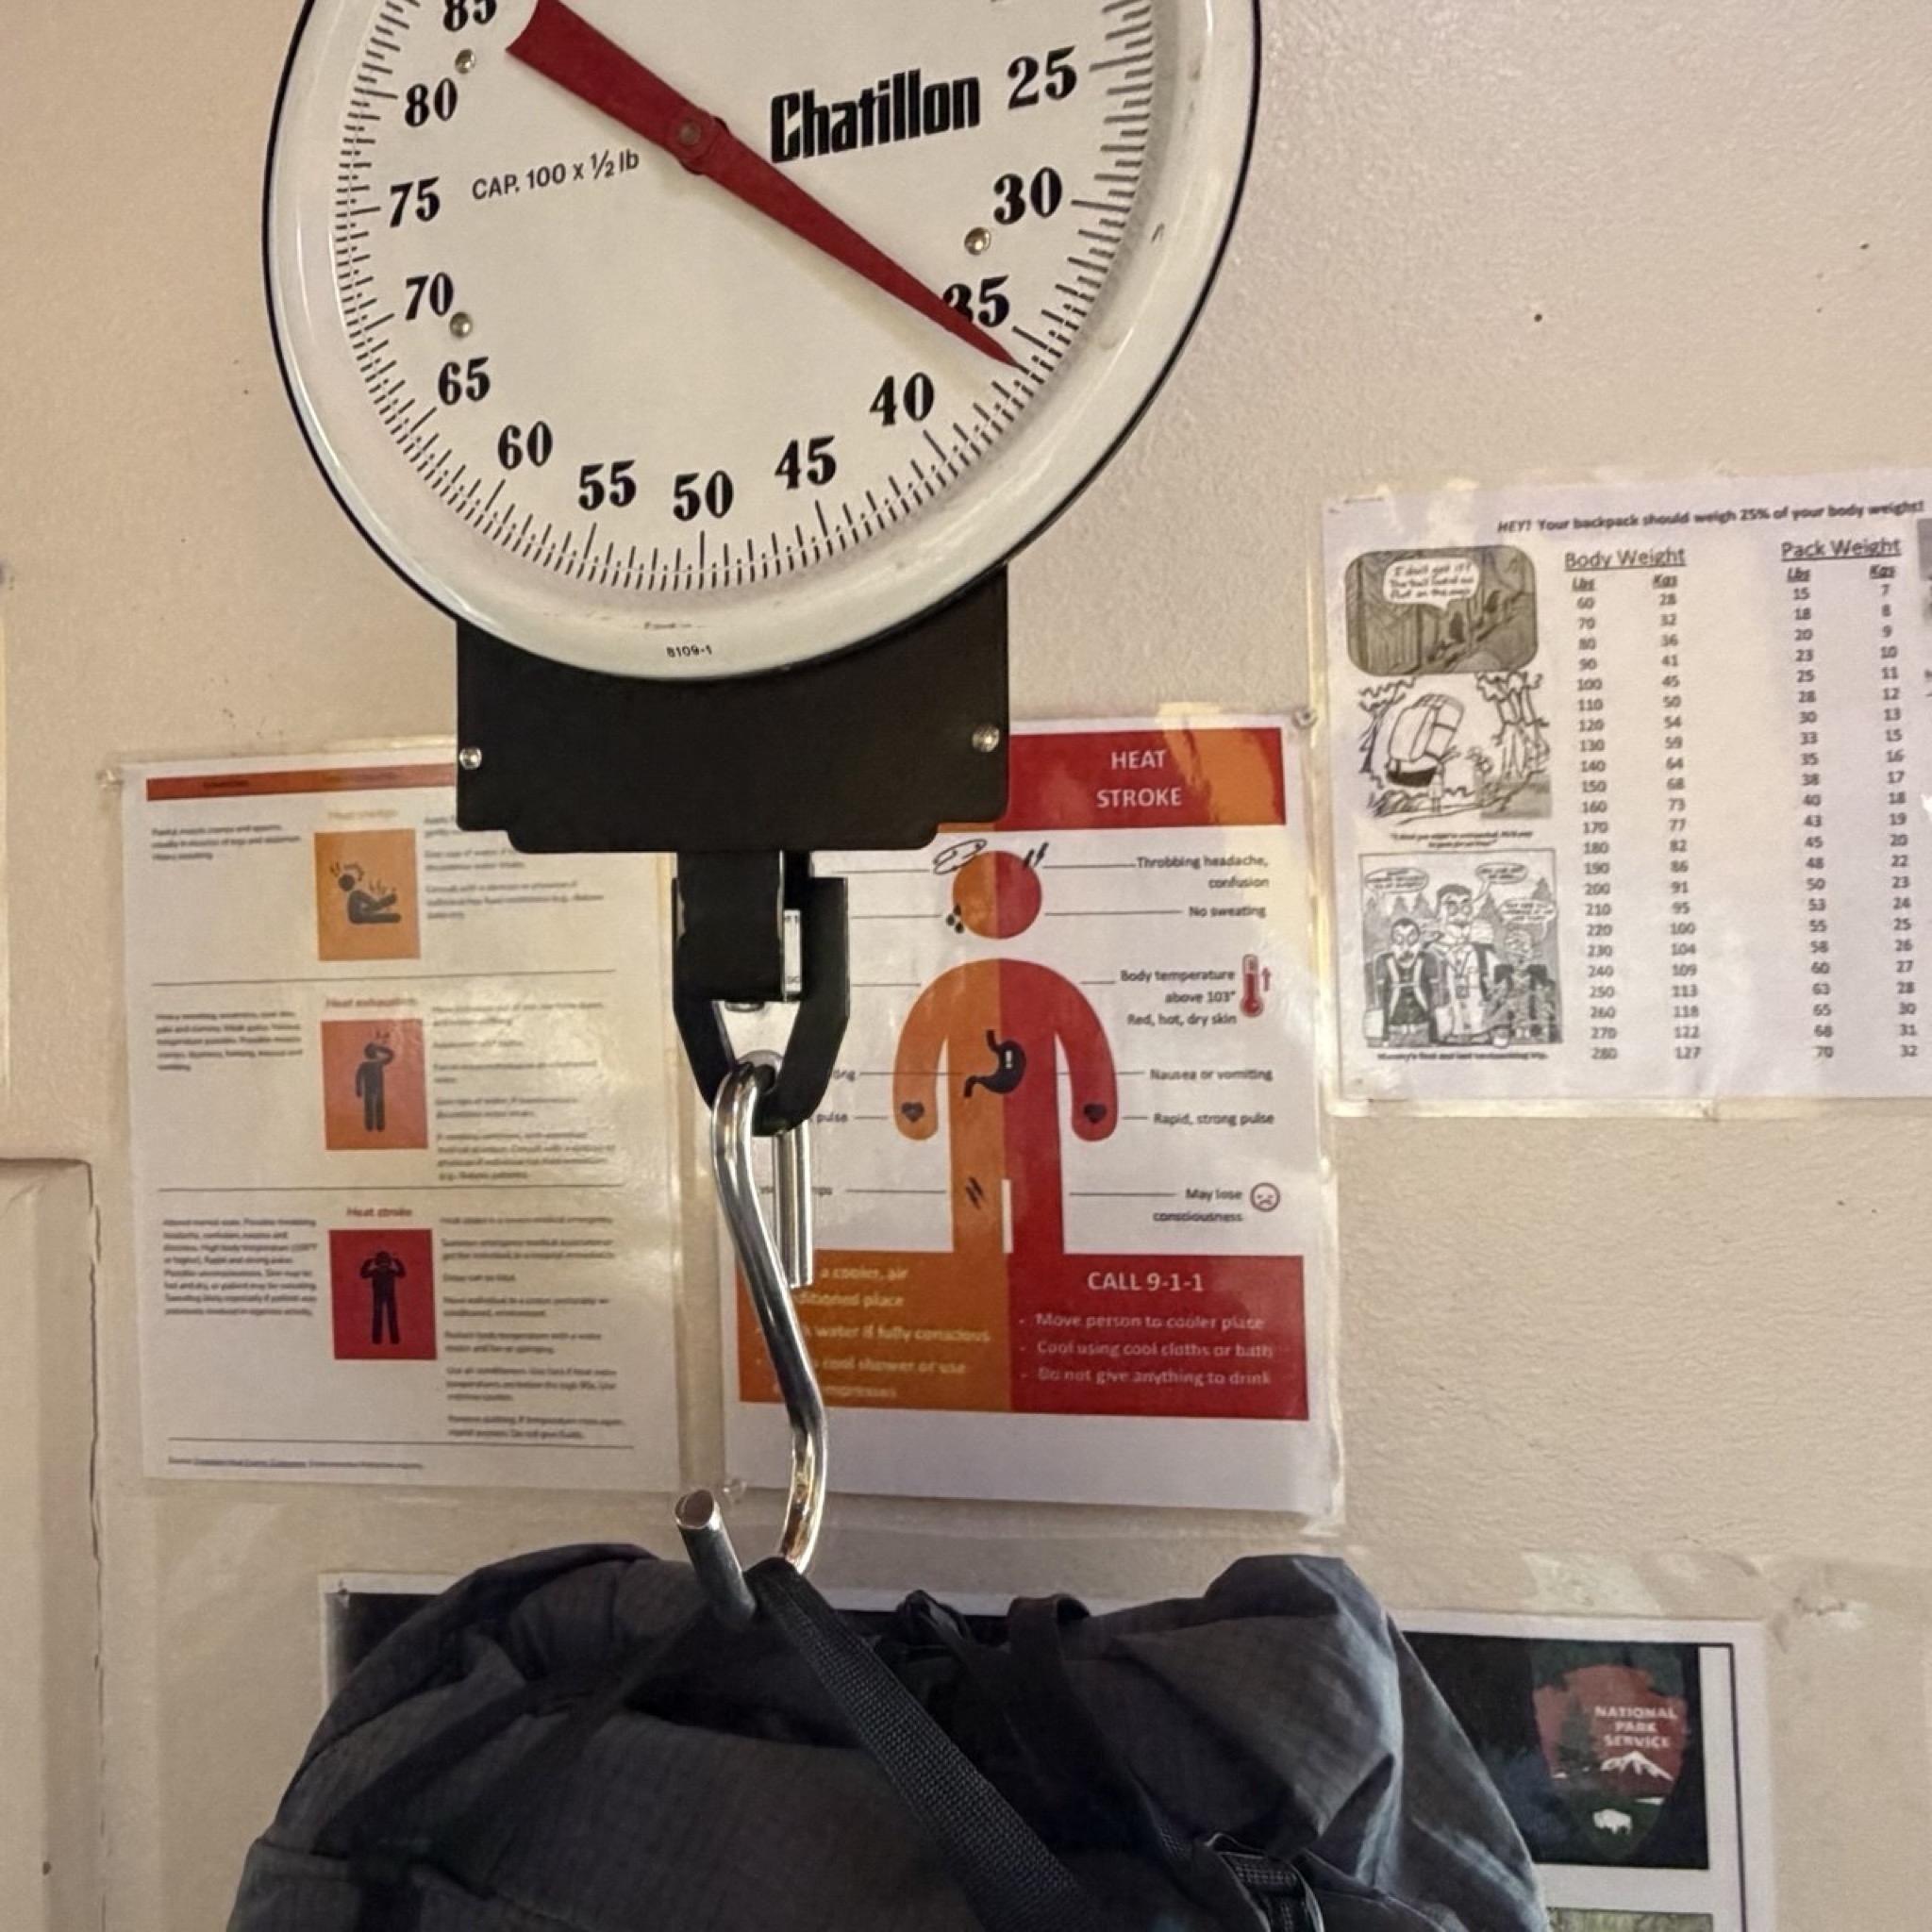
At the start of the trail my pack weighed 35 pounds, including 4.5 liters of water (~10 pounds) and my photography gear (~6 pounds).
If you go from north to south, I highly recommend starting your climb out very early. I started around 4am, and the last two miles were challenging — not from overall fatigue, but from the heat. Drink enough water with salts and electrolytes, but be careful not to drink too much: both hyponatremia and hypervolemia can have catastrophic consequences.
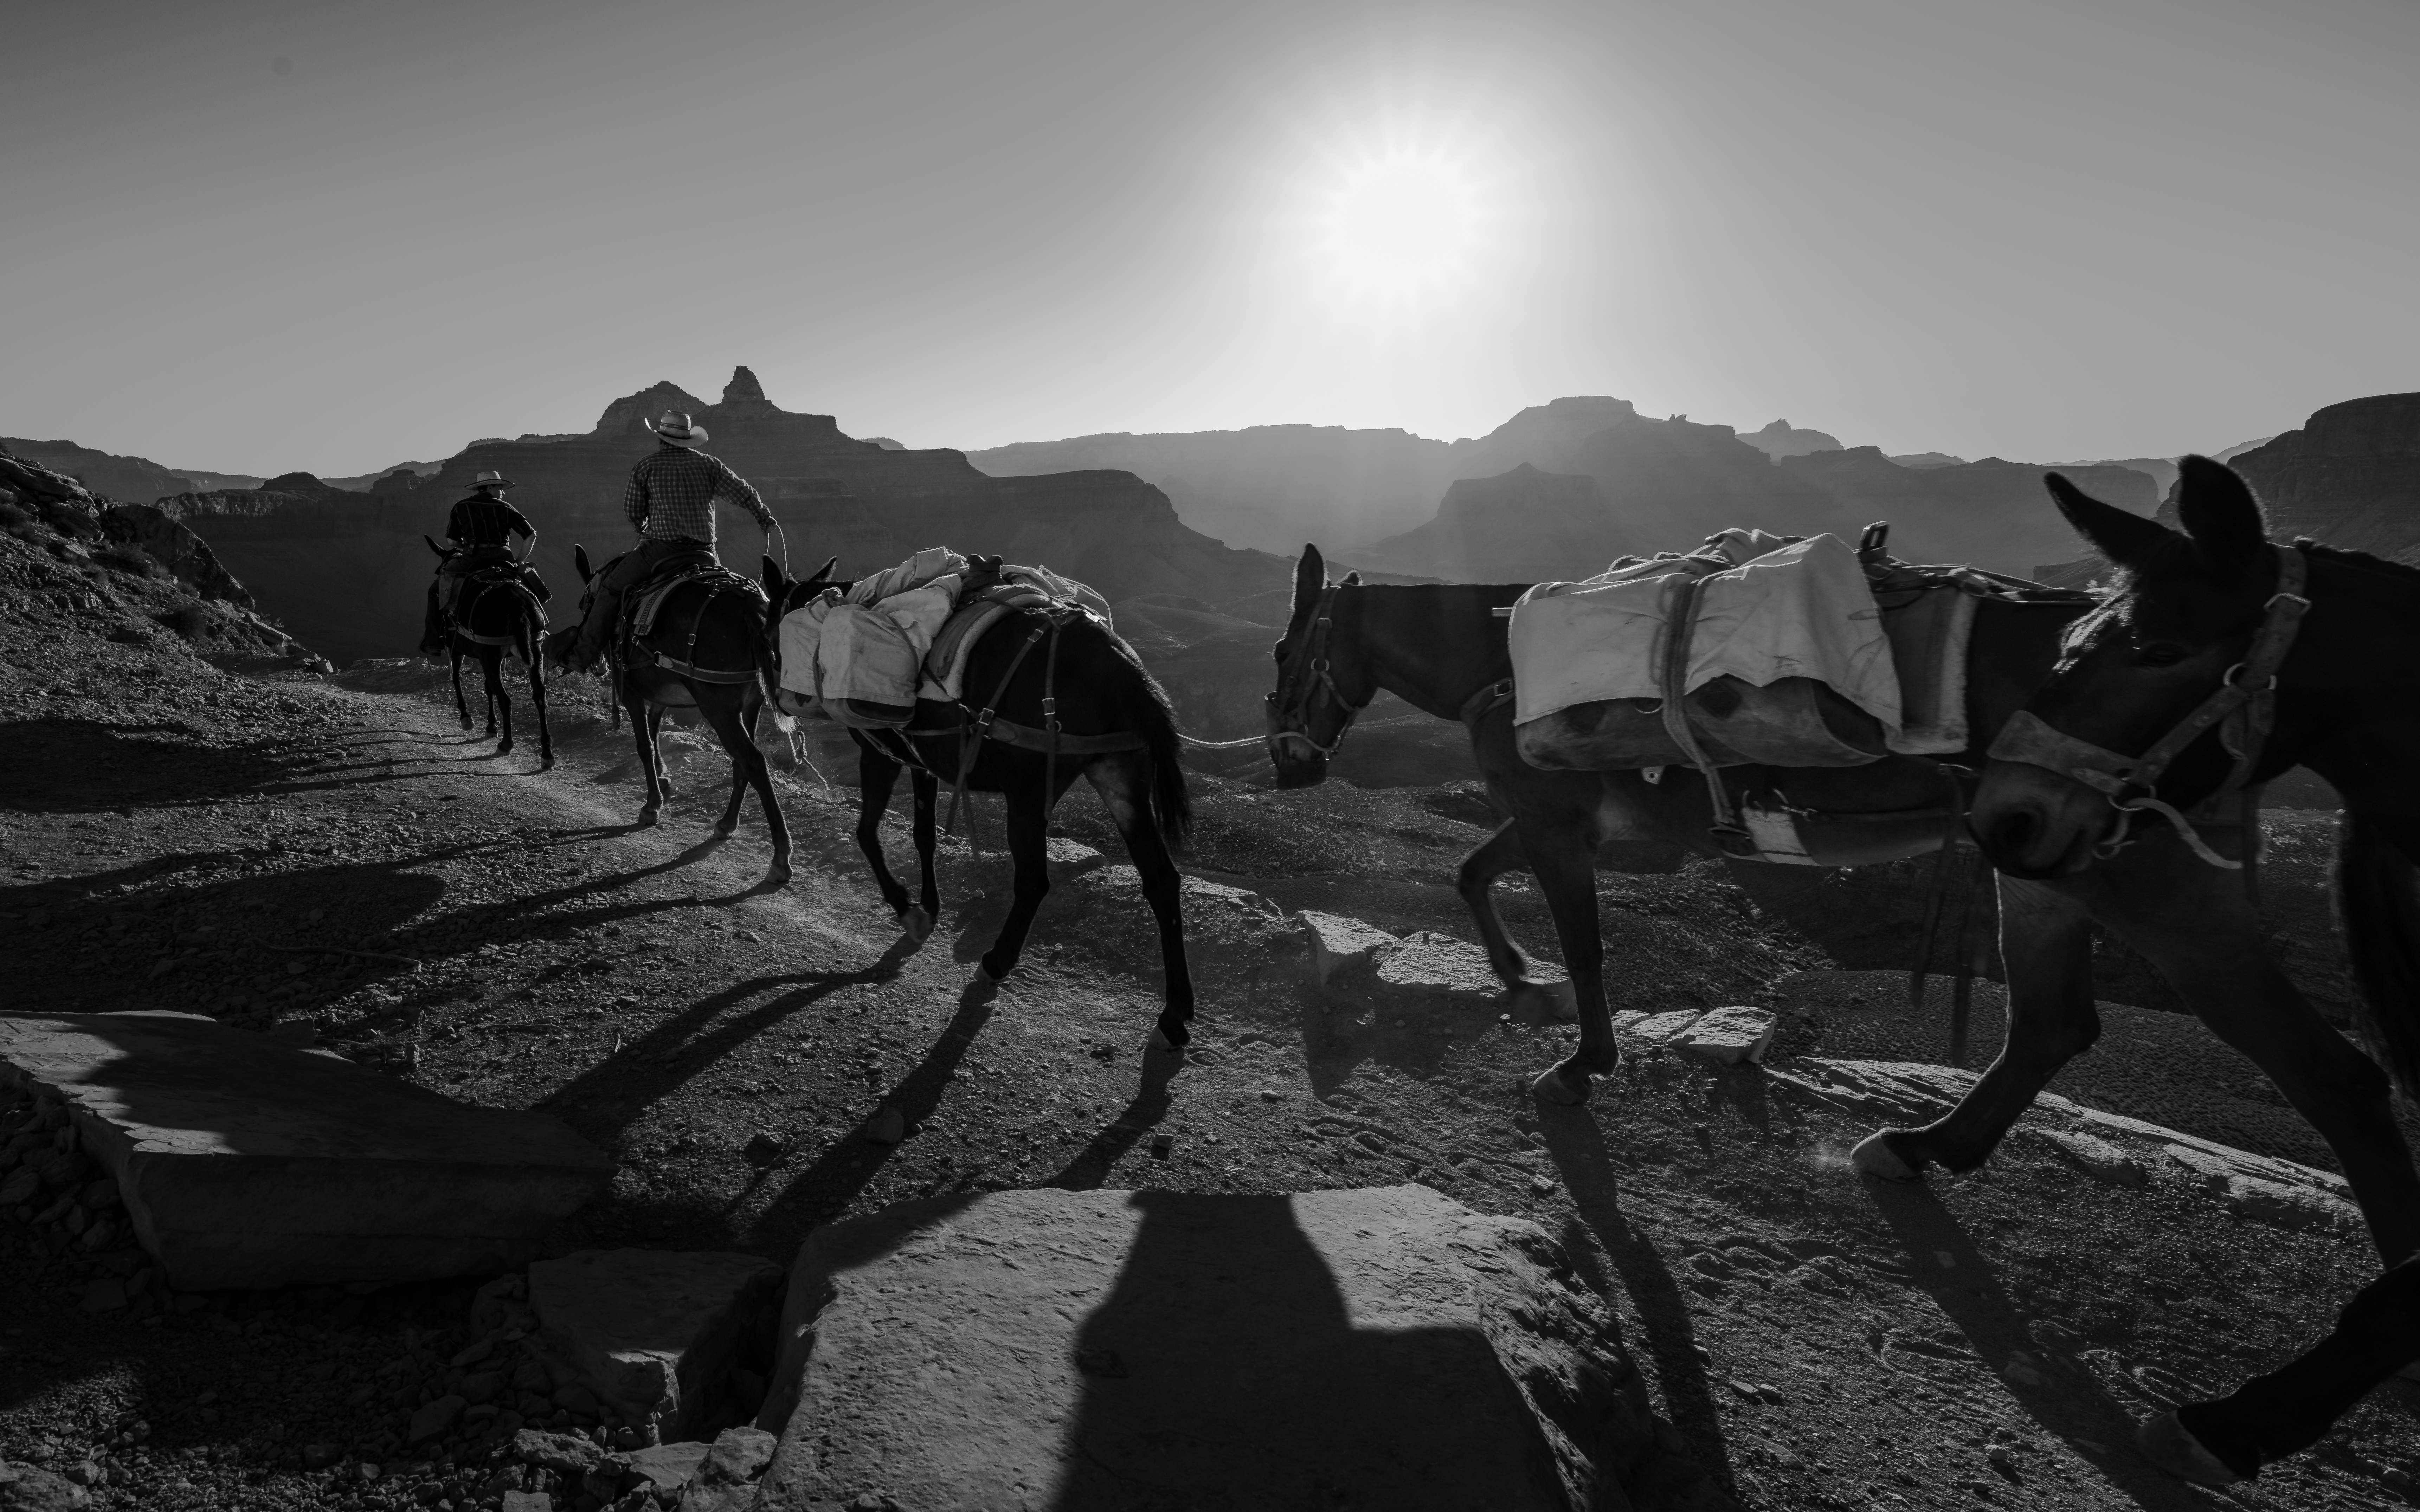
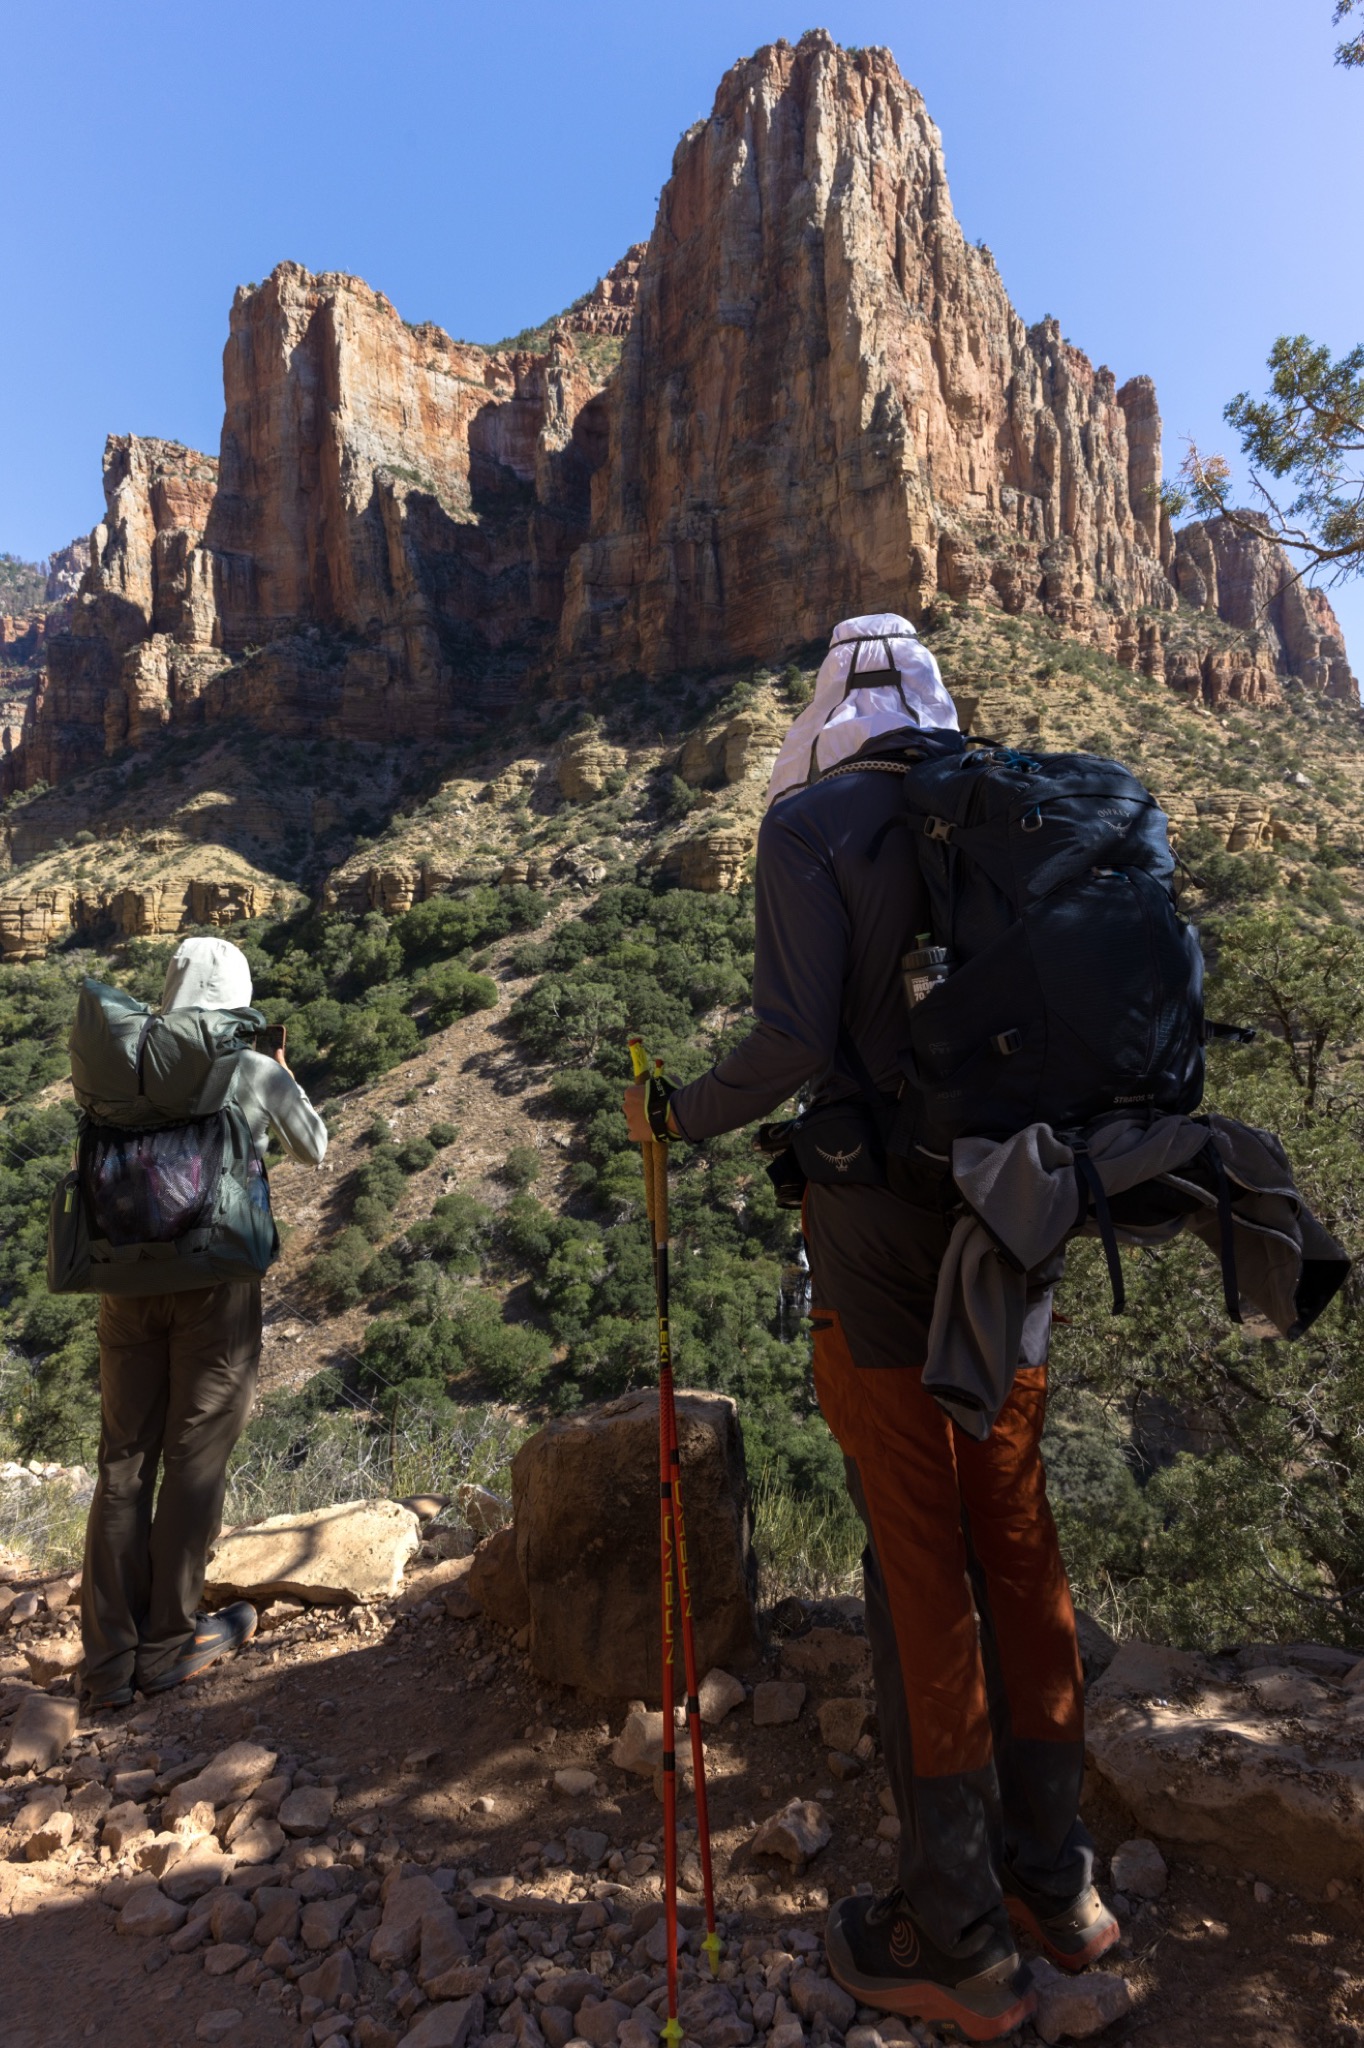
The people you meet on the trail
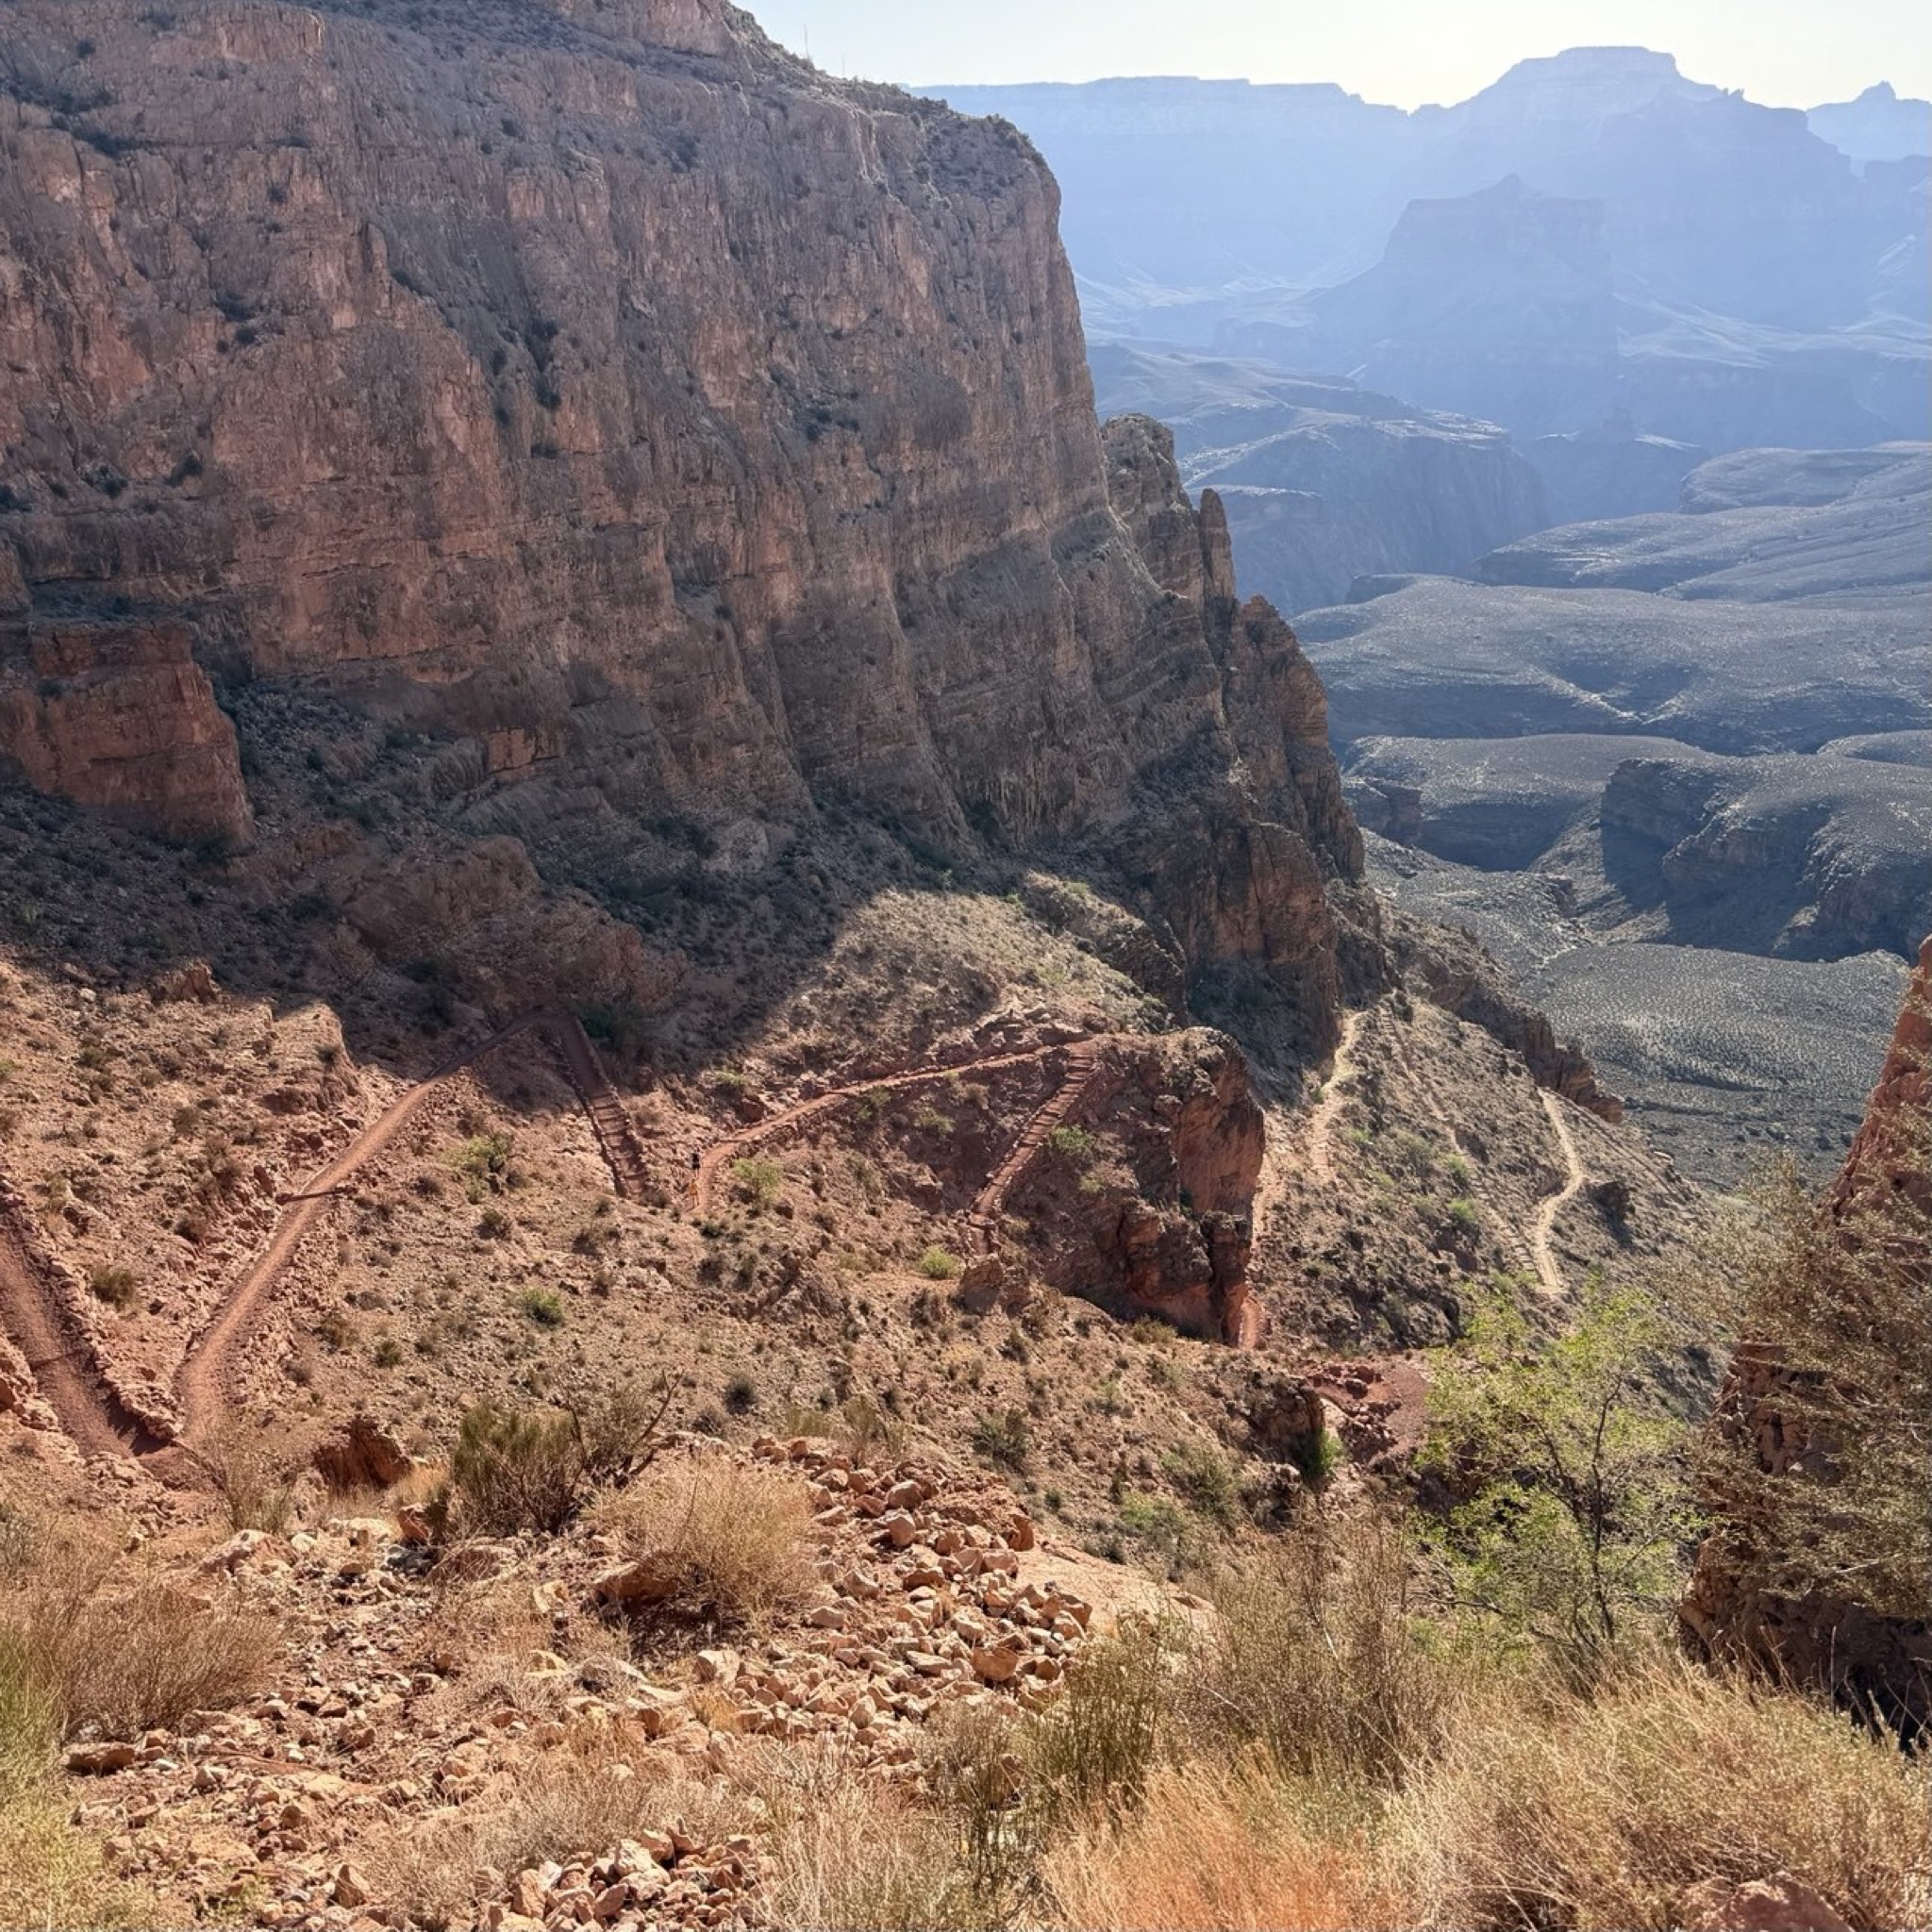
The trail itself is very well maintained. In the national parks there's a term for it — the "main corridor," the route most people take, and those trails are almost always in great shape. People are very friendly out there, so don't hesitate to make new friends. For the shot below, I was waiting for someone to cross a bridge and asked this guy to pose for me on it, which he gladly did. After that, we hiked together with him and his friend for the rest of my first day. The trail is one of my favorite places to meet new people, because so often they share the same interests and values I do. On many of my journeys I start alone and finish with a bunch of new acquaintances and friends — people I end up meeting again on trail in the years that follow.

Staying in touch
For communications, you don't need any satellite devices to stay in touch: both rims have good coverage, and the canyon itself has plenty of spots where I had a connection. Still, for safety, I recommend carrying a Garmin or Zoleo satellite communicator in case you need to call for help — all I'm saying is you don't need to buy a big message package to do this hike.
If you're curious about the gear I carried this year for long-distance hiking, here's my LighterPack.
Final thoughts
The Grand Canyon humbled me and rewarded me in about equal measure. It's unpredictable, it tests your skills, and it hands you something different every single morning — which is exactly why I'd go back tomorrow.
If this helped you plan your own trip, or you just want to see how the week looked through my lens, the full set is waiting in my Grand Canyon gallery.